

Threat hunting is currently one of the most sought-after skills in network security. The reason behind it is the proactive approach to looking for threats rather than the reactive approach — looking at your SIEM alerts — and then responding to them.
In a threat hunting approach, when we find some malicious file, binary, or a program, we need to collect the artifacts from them and search within our whole environment to find any possible traces of malicious activity. This process is usually done by analysing the content of the files, extracting Indicators of Compromises (IOCs) from them, and then searching for any hits/matches in the whole environment or the crown jewels depending upon your strategy. There are many tools to help us in this regard, including creating Yara rules to search for artifacts, using the Mandiant IOC collector to save different IOCs with AND/OR conditions, and using Redline to search for the IOCs collected by the Mandiant IOC collector within a disk/memory.
In this post, I will be looking at creating Yara rules for a malicious file and searching for any hits based on that Yara rule.
So, what are Yara rules?
Yara rules classify and identify malware samples by creating descriptions of malware families based on textual or binary patterns. We can use Yara rules to define text or binary patterns that will match a file or component of a file to quickly find malicious files.
Structure of Yara rules
The structure of Yara rules is very simple — see the following example:
rule MyFirstYaraRule
{
    strings:
        $my_text_string = "text here"
        $my_hex_string = { E2 34 A1 C8 23 FB }

    condition:
        $my_text_string or $my_hex_string
}
Let’s break this down.
The word rule here is a reserved word that shows the start of a Yara rule. The string MyFirstYaraRule is the name that you choose for your Yara rule. It is a good idea to write a meaningful name to recognize it later when we are looking at the results based on multiple Yara rule hits.
The string: section defines strings (HEX strings as well) that you want to search for (usually based on your logic of identifying a malicious file). You can have as many strings as you want.
The condition: section defines the conditions that you want to check so that your Yara rules can trigger a match. The above sample rule is checking for any of the strings defined in the strings: section. However, it is not limited to this condition only. We can make our condition to match for file size, its type (such as MZ or executable), different combinations of (AND/ OR conditions), and many more — see official Yara documentation for more examples.
Things will be more clear when we create a Yara rule for a malicious file from scratch and then use it to search for traces within a host/device/server.
Scenario: You are working in the Threat hunting team and have found a malicious file within one of your systems. Your manager has assigned you to collect the artifacts from the file, write a Yara rule and then search for it across your organization. The malicious file is named ‘promotion-document’, which is an executable (.exe) file but is disguising itself as a .pdf file to trick users into opening it, therefore executing the malware.
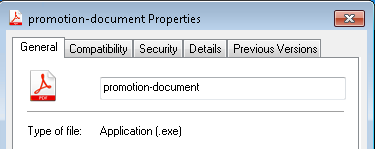
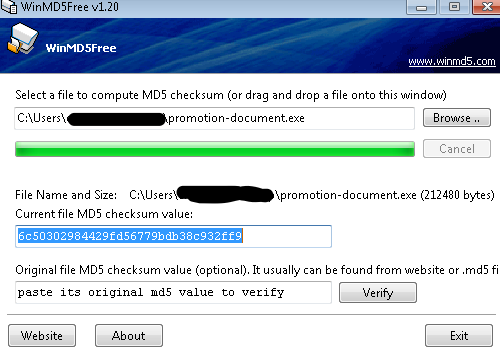
The snapshot above clearly shows us that the file is a .exe file but is appearing as an Adobe Acrobat document (remember this information while writing Yara). We can calculate the hash using tools such as HashCalc or WinMD5Free of this file, and check if there are any hits on platforms such as VirusTotal. I used WinMD5Free to calculate the hash as shown below:
Checking the hash on VirusTotal shows us the number of hits, although, in this scenario, we’ve already confirmed this is a malicious file.
Now comes the part where we try to find strings or patterns and conditions to detect the malicious file. If you recall, Yara rules are used to detect/classify malware based on textual or binary patterns. This means we need to find unique texts/strings that can identify this malicious file.
There are many other ways in which Yara rules can be written to identify malicious files. For this article, we are sticking only with the unique strings.
There are two ways to extract strings from a file:
- By using the strings.exe utility, which is part of Sysinternals.
- By leveraging YaraGen, which writes the Yara rule for you.
For the sake of this post, we will be relying only on the strings.exe for extracting relevant strings for our Yara rule.
Using strings.exe
strings.exe is very easy to use. You just need to go to the path where strings.exe is installed, and use the following syntax:
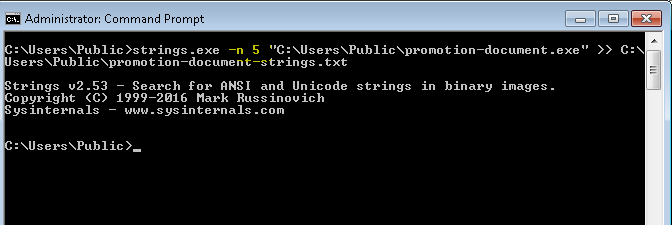
"pathtoStrings.exeFolder\strings.exe "Path of the file you want to generate strings of" >> PathtoOutputFolder\OutputFile.txtThe malicious file in our case is inside the "C:\Users\Public" so our command would be:
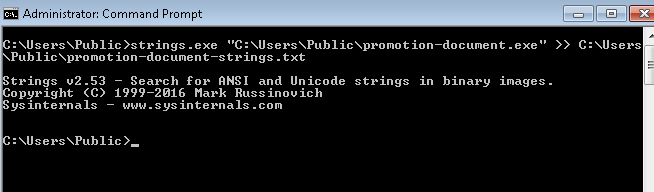
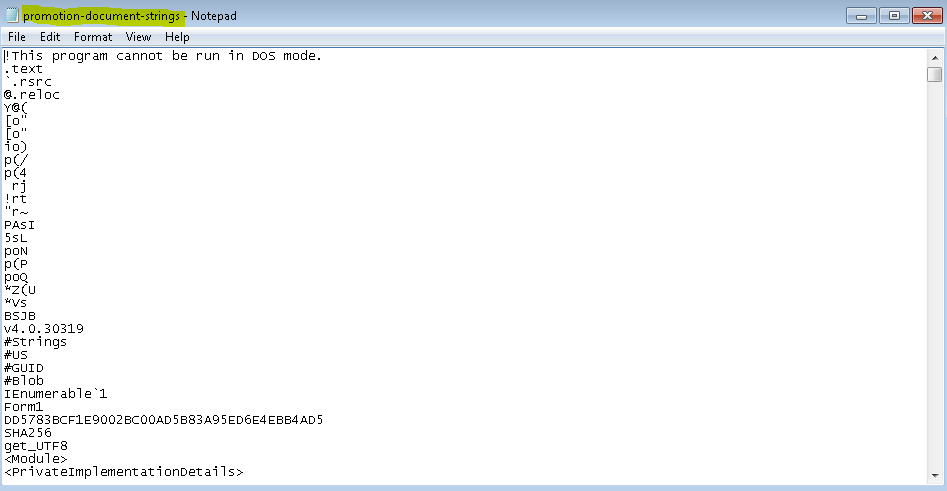
The control has successfully returned after executing the command. Now going to our output folder, we will see the file promotion-document-strings.txt. Opening it will show us different strings that were extracted from this malicious file, as shown below.

As you can see, it has extracted a lot of strings for us to examine and decide what are unique enough to identify this file. A quick note here regarding the strings.exe by default; the length of strings that strings.exe extract is 3 which means it will show all the strings that are of length three and higher. In our case, this is not a good selection as we can see plenty of garbage strings (strings that are not important to us in the context of identifying a file). So now we are going to eliminate them and set the length to 5 to ensure we have good strings to look at and choose from.
If you look closely at the highlighted command, I have added -n 5 into it. The -n parameter allows us to give the length we want strings.exe to look for and then extract the strings.
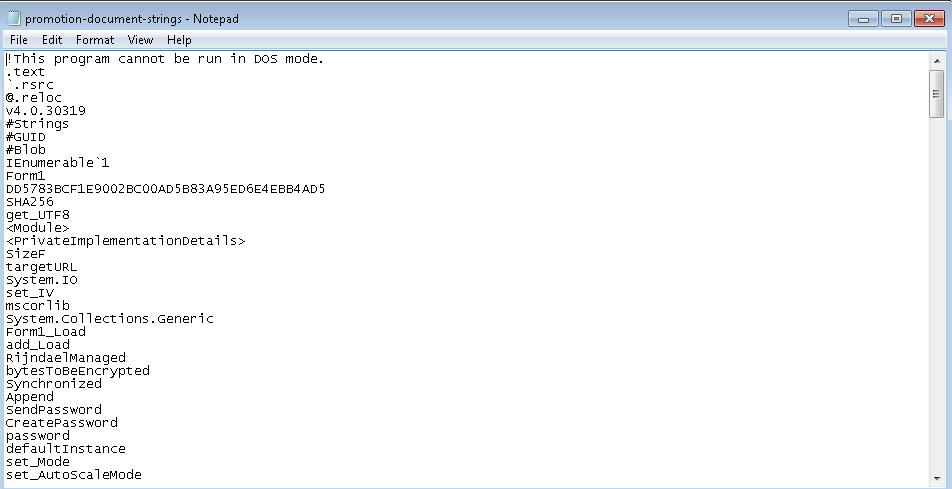
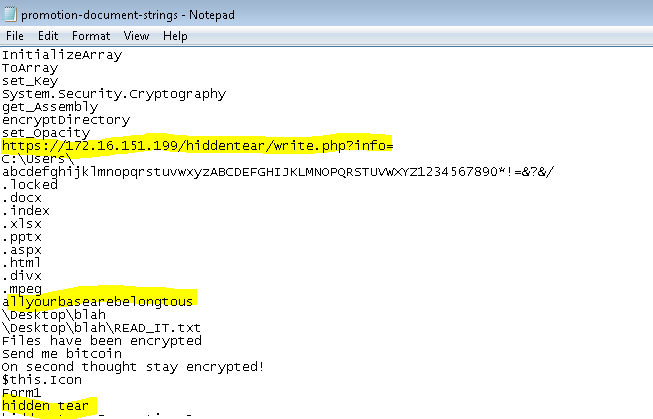
Figure 7 shows us all the strings extracted by strings.exe where the length is equal to or greater than 5. We can play around with it until we find the length that is adequate for our task.
Scrolling down the file, we noticed some interesting strings. For example, we don’t normally see a link pointing towards an IP and it is going to a .php file, so this is a good artifact for identifying this file. There are few other notable strings highlighted.
Now we have enough strings and information about this file to write a Yara rule for it and then try to analyse it. Let’s go back to our sample Yara rule shown above and populate it with the relevant details.
rule MyFirstYaraRule
{
    strings:
        $my_text_string = "text here"
        $my_hex_string = { E2 34 A1 C8 23 FB }

    condition:
        $my_text_string or $my_hex_string
}
After populating it with the relevant details:
rule MyFirstYaraRule {
	meta:
		description = "promotion-document PDF/EXE"
		author = "Larosh"

	strings:
		$s1 = "https://172.16.151.199/hiddentear/write.php?info="
		$s2 = "allyourbasearebelongtous"
		$s3 = "hidden tear"
		$s4 = "this is not incldued in file"

	condition:
		all of them
}
Before moving further, I will explain a few things. The meta section above is optional and it contains different information such as a description of the rule, author name, hashes, and so forth. More information regarding this is available in the official Yara documentation.
The strings part contains four strings. The first three strings were selected by us earlier. However, I’ve added another string, $s4, which I’ll discuss in the next section.
Running our Yara rule
It’s now time to run our Yara rule and see if it catches the malicious file.
There are multiple ways/tools to run Yara rules such as the original tool provided as mentioned in the Yara documentation itself, or loki, or thor and so forth. We will be using the Yara as provided by the Yara documentation for this post. Please refer to the documentation for complete details.
To invoke YARA, you’ll need two things:
- A file with the rules you want to use (either in the source code or compiled form).
- The target to be scanned. The target can be a file, folder, or process.
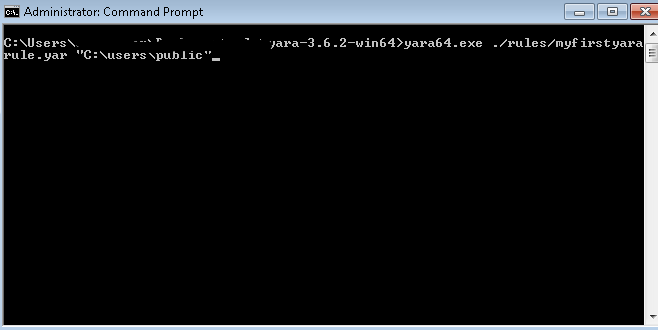
Run the syntax: yara.exe “path to your yara rule inside the rule folder” “Location where you want to search”.
Figure 9 shows I am now executing the Yara rule we created to search inside the "C:\users\public" directory.
Executing the command has returned the control to us without showing any hits, as shown below:
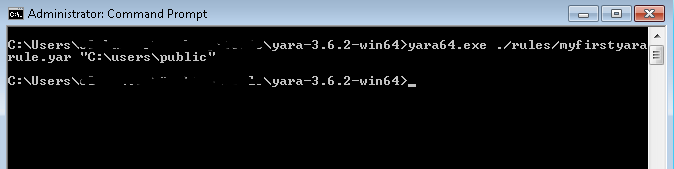
The reason behind the no hits is the fourth string we included and the condition we set. If we recall our Yara rule, we added the fourth string $s4 =. This is not included in the file and in the condition section. We wrote all of them, which will show us matches if all of our defined strings are present in a file. Since the fourth string was not present in the file, no hit was found. Let’s modify our rule and try again.
rule MyFirstYaraRule {
	meta:
		description = "promotion-document PDF/EXE"
		author = "Larosh"

	strings:
		$s1 = "https://172.16.151.199/hiddentear/write.php?info="
		$s2 = "allyourbasearebelongtous"
		$s3 = "hidden tear"
		$s4 = "this is not incldued in file"

	condition:
		3 of them
}
After running the same command again, we see a hit.
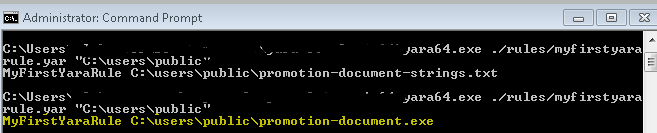
The output can be understood as “Name of your Yara rule on which hit was found” “this is the path of the file where hit was found”. If we look closely, we can see the hit to the malicious file is found.
The same Yara rule can be used to find malicious files across your enterprise by using the method shown above. I hope you’ve enjoyed this post — I welcome any feedback in the comments section.
Adapted from original post that first appeared on LinkedIn.
Mohammad Larosh Khan is a Security Operations Center Analyst at NourNet.
The views expressed by the authors of this blog are their own and do not necessarily reflect the views of APNIC. Please note a Code of Conduct applies to this blog.
I would like to ask. Is there a way to make use of Yara rules with an automated tool like an IDS or Vulnerability scanner? If yes, how can it be incorporated? Thank you.