

As you may know, APNIC offers Members the option of running their own delegated Resource Public Key Infrastructure Certificate Authority (RPKI CA) instead of using the MyAPNIC RPKI service. Moreover, APNIC also allows Members to make use of the APNIC managed RPKI repository infrastructure for publication of their RPKI objects. The latter is a truly great addition to this service as it reduces the costs and risks of running one’s own delegated CA dramatically.
In this post, we will demonstrate how to set up Krill under APNIC using these services.
Set up a Krill instance
The first step is to set up a production Krill instance for your CA. If you want to have a look at how we set up our Krill CA server, with multi-user logins and Let’s Encrypt and NGINX for secure access, then please review the section called ‘Production CA Server with Multi User Access Setup’ in this blog post. Note that you can skip the first part about the setup of a Krill Publication Server, because you can (and probably should) use APNIC’s Publication Server instead.
Configure an RPKI CA under APNIC
After installing and configuring the Krill server it’s time to create your own new CA instance. In this post we will use a CA called ‘apnic-demo’. It will receive private use IP addresses and Autonomous System Numbers (ASNs) — since we at NLnet Labs are not actually a Member of APNIC.
In order to run your CA under APNIC you will have to exchange a total of four XML files that are used for the RFC 8183 exchange of identity keys between your CA, the APNIC parent CA and the APNIC Publication Server.
NOTE: If you already enabled RPKI in MyAPNIC and you want to switch to using your own self-hosted CA instead, then you will need to contact the APNIC Helpdesk. They can then reset your state allowing you to re-enrol using your own CA.
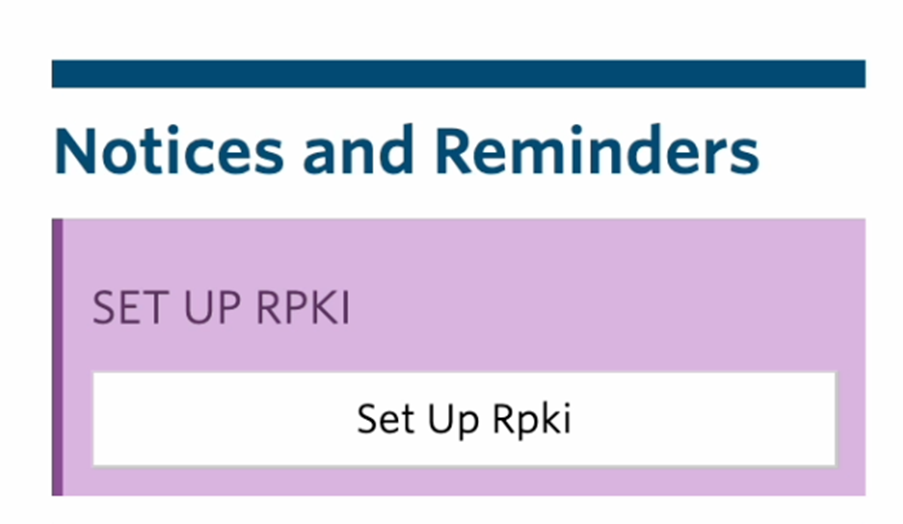
Provided that the RPKI is not enabled, you’ll see the notice shown in Figure 1 in MyAPNIC:
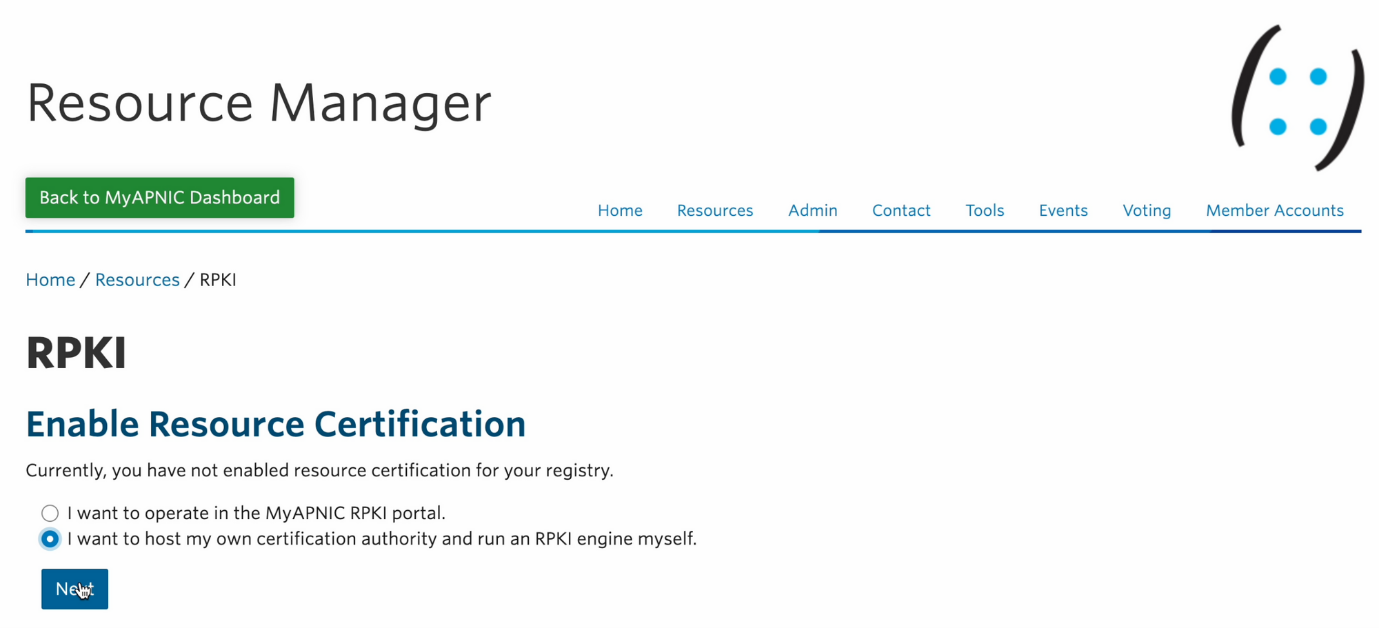
‘Set up RPKI’ is shown as a to-do item under the Resource Manager. It’s also found under the Resource Certification section in the Resources tab. Clicking the link will launch a setup dialogue. Choose the option shown in Figure 2.
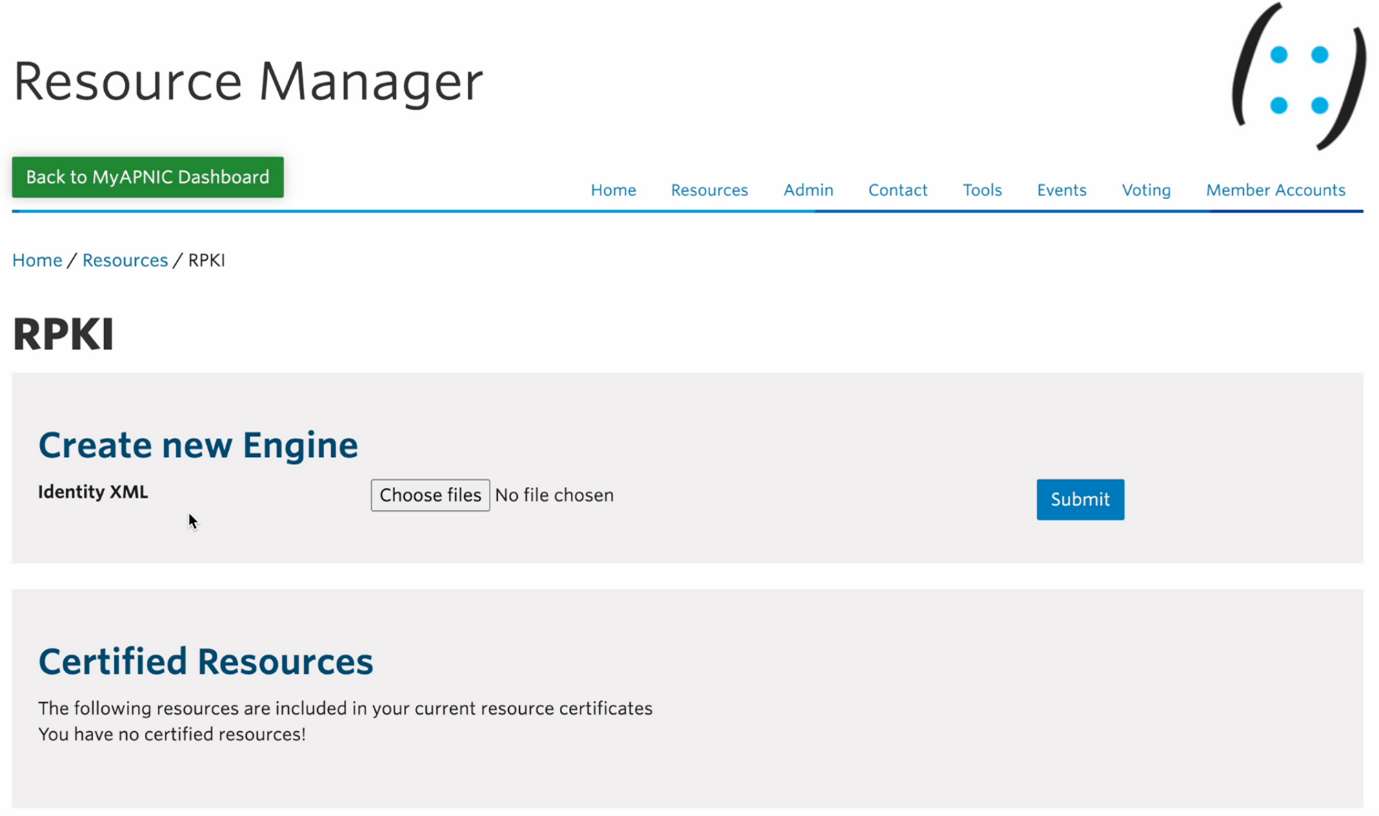
After accepting the terms and conditions you will then see an option to create a new engine where you can upload an identity XML file:
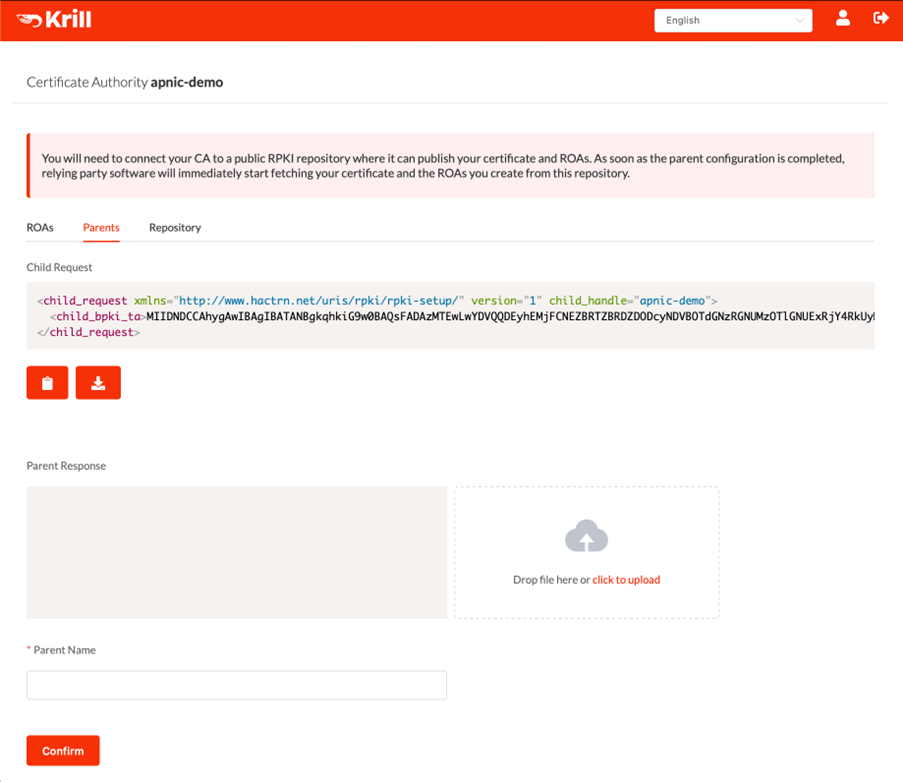
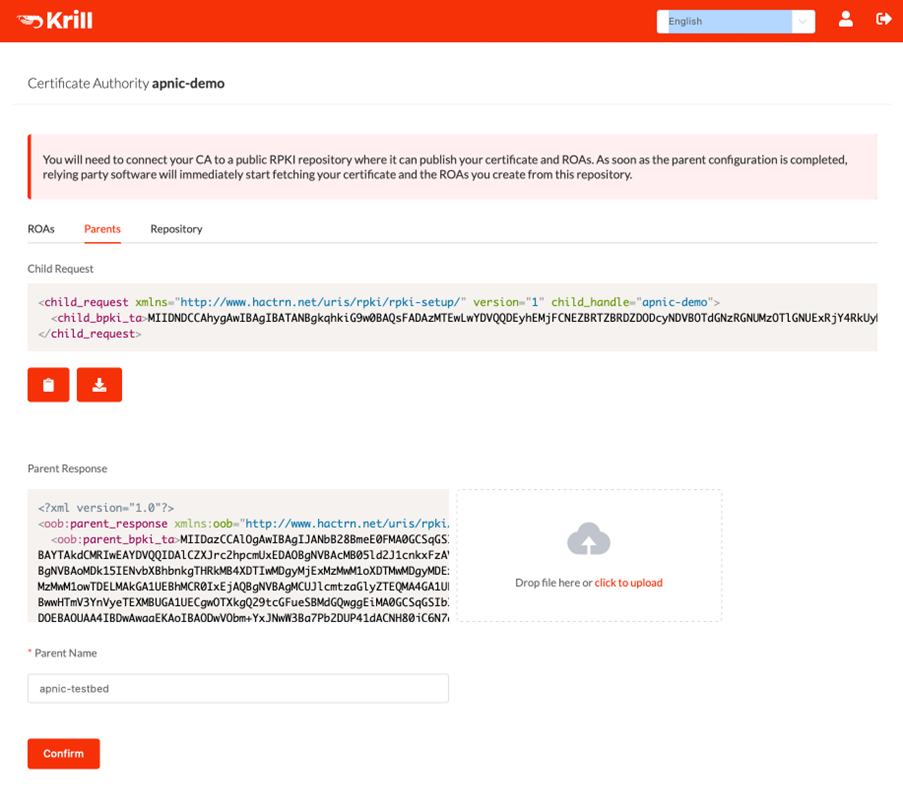
The identity XML file mentioned above is our Krill CA’s RFC 8183 child request XML file, which can be copied or downloaded under the ‘Parents’ tab:
After uploading the XML file, the APNIC side of the RPKI will be initialized and four different XML file options will be shown:

After uploading the child request XML, you won’t need it again unless you want to replace your own CA or update its identity key. The latter is possible but shouldn’t be needed.
We will get to the ‘publisher request’ and ‘repository response’ in a moment, but for now download the ‘parent response’ XML file and upload it using the Krill UI.
Name the parent CA anything you like in your local Krill configuration. This will be used by users of the local Krill system to see the parent in question in the Krill logs, tables, and so on but is not used in any public communications with the parent CA system.
After adding the parent, the repository still needs to be configured so download the publisher request XML from the Repository tab in Krill.
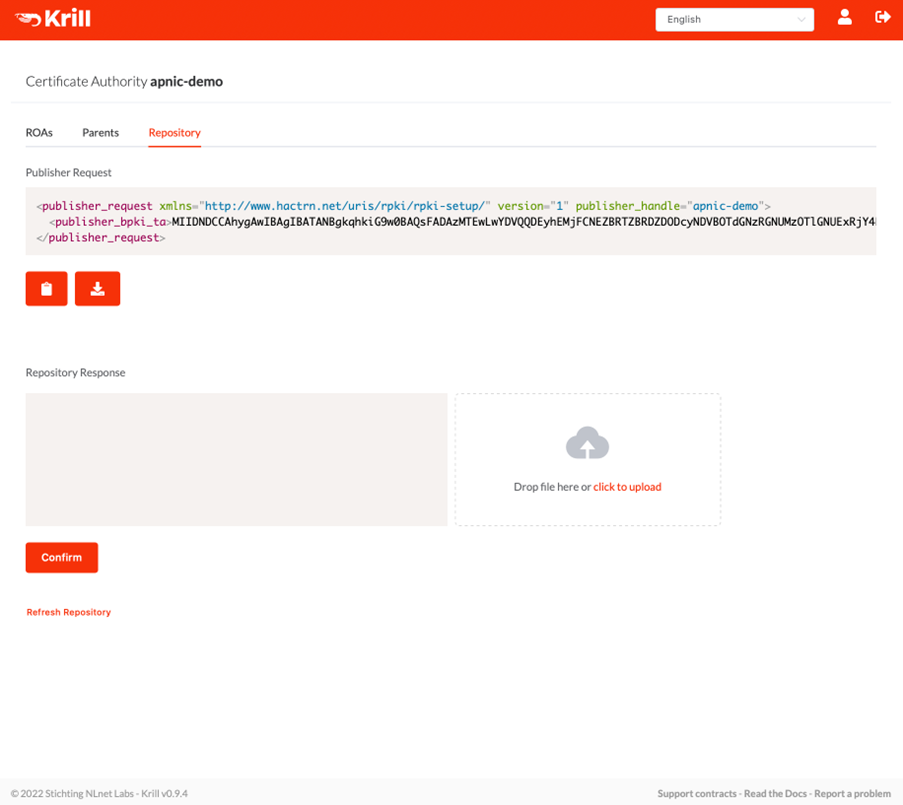
Then upload this publisher request XML file in MyAPNIC. You can only do this after successfully submitting the child request, because the APNIC system insists that the handle used in both requests match. As a user, you don’t need to worry about this in practice because Krill will simply use your locally chosen CA name for this purpose, but it may help to know if you ever need APNIC support.

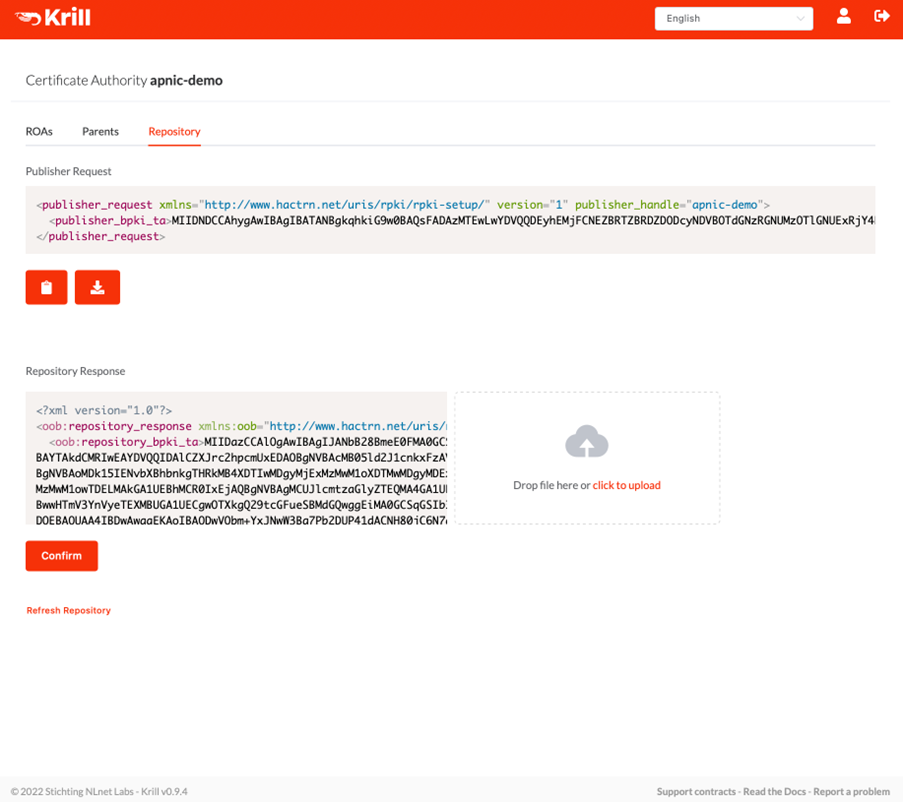
Then download the ‘repository response’ XML, and upload it via the Krill UI:
After uploading this response, Krill will notice that both a parent and a repository have been configured and it will show the Route Origin Authorization (ROA) page. But usually, you will be taken here just before Krill finishes successfully requesting its certificate from the APNIC parent:
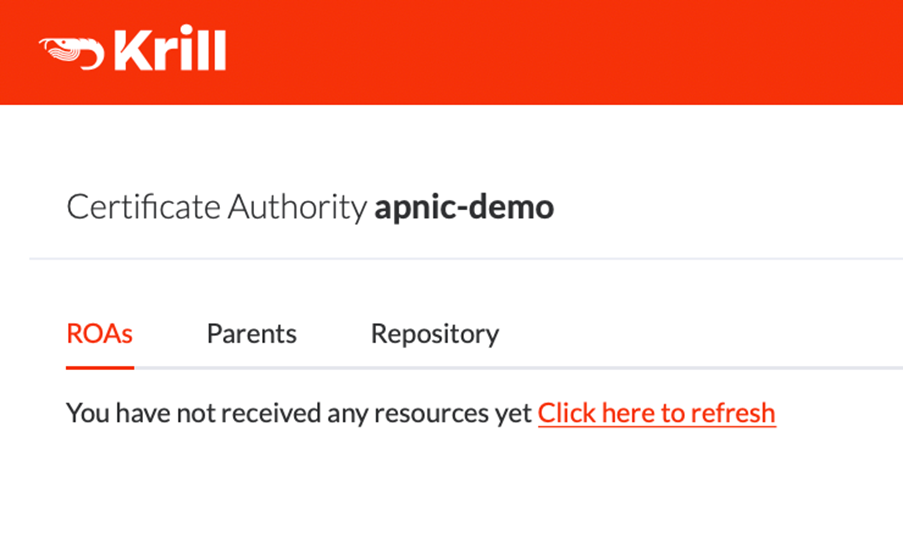
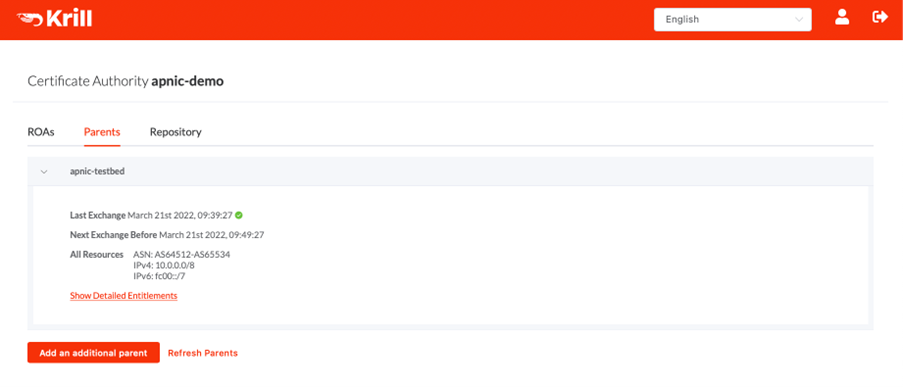
The certificate is being requested in the background, but feel free to click the refresh link on the ROAs or Parents tabs. After refreshing you can check the Parents tab for the connection to the parent, and resources received:
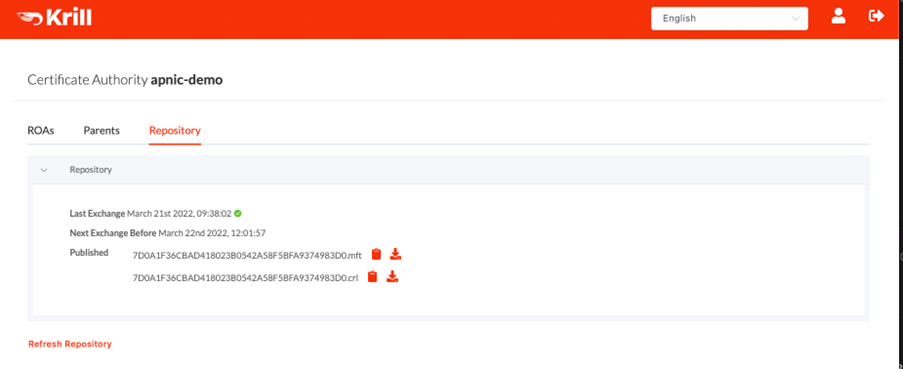
On the Repository tab, you can now see that Krill has published a manifest and Certificate Revocation List (CRL) for the received certificate. No ROAs of course, because you haven’t configured any yet:
Now you can start configuring ROAs — or rather, ROA configurations — as Krill does not give the user direct control over the ROA RPKI object as such. Instead, Krill’s philosophy is that operators declare which announcements should be authorized, and then the system will take care of creating and renewing the actual RPKI ROA objects for each authorization.
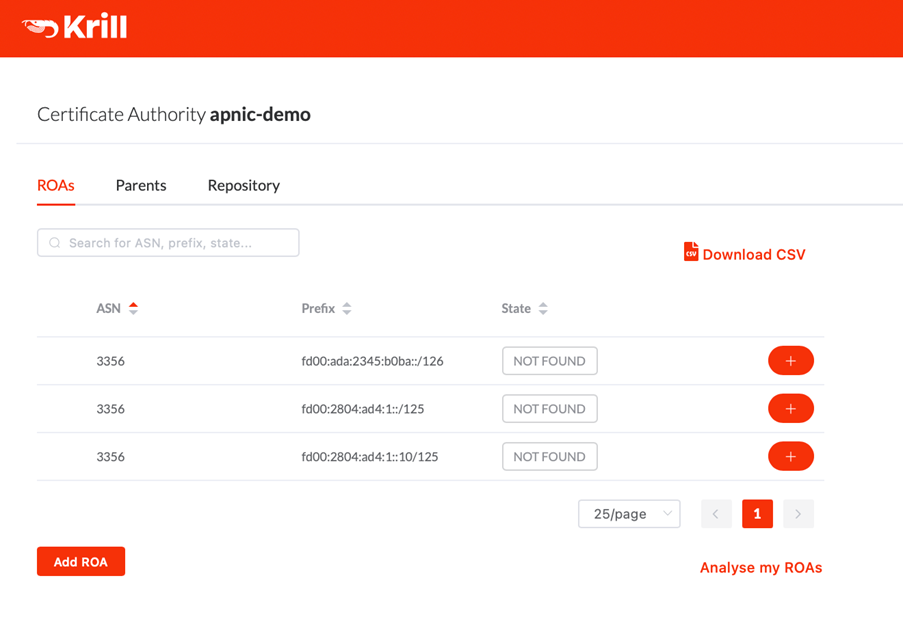
Krill uses information from RIS Whois, made available by the RIPE NCC, to show operators known announcements to help them configure their ROAs.
In this demonstration instance’s case, we would not expect announcements for private prefixes to be shown — but it seems that a small number of Routing Information Service (RIS) Route Collectors did see some announcements for private space:
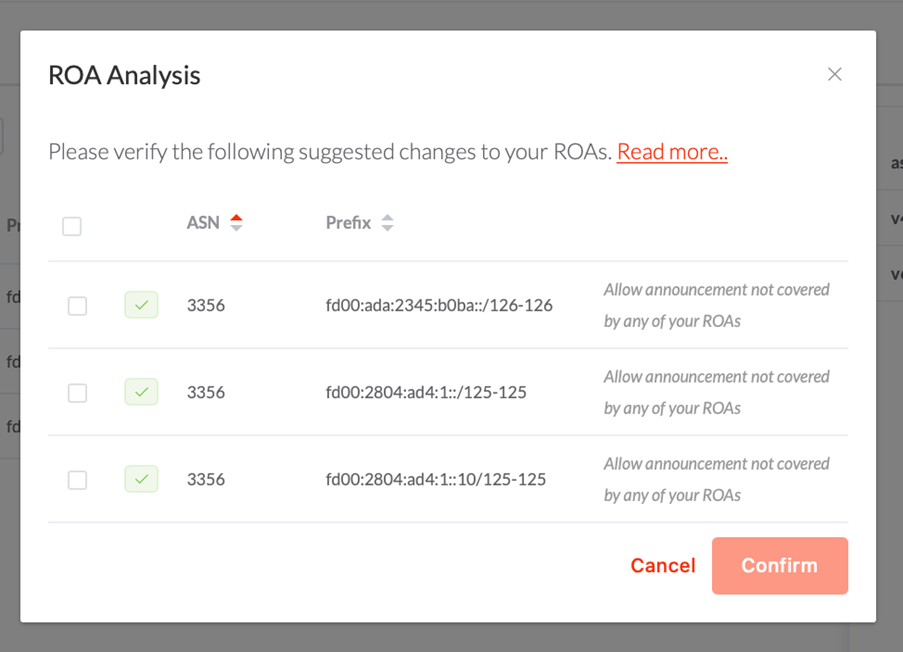
After pressing ‘Analyse my ROAs’ (Figure 13) Krill suggests to create ROAs for each ‘not found’ announcement. Even though Krill may suggest this, you should only select the announcements that need to be authorized. For this demonstration, we selected all the suggestions shown:
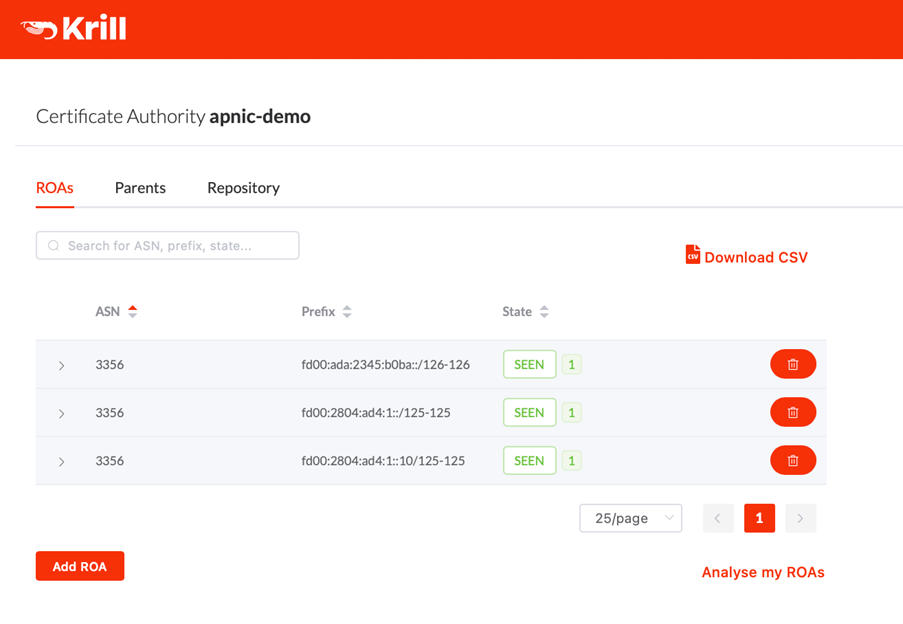
After creating these ROAs, they show up in the Krill UI, with the status ‘SEEN’, which means that the announcement is seen in BGP, and it’s authorized by at least one of your ROAs:
A thorough discussion on Krill ROA management and suggestion goes somewhat beyond the scope of this post, but please have a read of the Krill documentation if you want to know more about this.
That’s it. Now you have Krill running under APNIC. Krill will keep checking that it’s still entitled to the resources it received, and it will keep republishing a new manifest and CRL before they expire. If the configuration is left untouched, then it would also reissue new ROA objects when the time comes. In short, Krill will just keep doing its work, and all the operator needs to worry about is that it is configured to authorize the correct announcements.
Tim Bruijnzeels is a senior software developer at NLnet Labs, who has been involved in RPKI standards development and software implementation for well over 10 years.
The views expressed by the authors of this blog are their own and do not necessarily reflect the views of APNIC. Please note a Code of Conduct applies to this blog.