

This post is an update to the 2019 ‘how to’ post on Installing an RPKI Validator. In the last post, the author described the process for installing the relying party software (or RPKI validator) required to validate ROAs. Tashi focused on how to install Routinator, RIPE, OctoRPKI and FORT validators on an Ubuntu Linux system (16.04).
Since 2019, several changes have happened in the space of RPKI validator software. Not only has Ubuntu 16.04 reached its end of life (29 April 2021) but the RIPE software has been deprecated and is no longer maintained (since July 2021). Similar, OctoRPKI is not actively maintained apart from critical fixes for vulnerabilities.
As in the 2019 article, the choice of which validator to use is yours, but a suggestion is to run at least two validators (whether it is the same code base or different code base), not just for redundancy, but also because the validation states change to NOT FOUND for all routes when RPKI-enabled routers lose connection with the validators. For more detail about selecting an RPKI validator refer to:
This post will show you how to install Routinator (go to section), FORT (go to section) and RPKI-Prover (go to section) validators on an Ubuntu Linux system (18.04 or 20.04).

Preparations
Before starting to install the validator of your choice, ensure the packages are up to date.
sudo apt update && sudo apt -y dist-upgradeAlso ensure any other required software is installed.
sudo apt install -y curl wget git gcc rsync build-essentialNote: By downloading ARIN’s Trust Anchor Locator (TAL) in any of the steps below, you agree to be bound by ARIN’s Relying Party Agreement (RPA).
Based on the RPKI Relying Party Study, Routinator has the most installations. Routinator 3000 is a routing security initiative by NLnet Labs.
1. Installing Routinator
Run the following curl command, which will download a script that downloads and installs rustup and then rust.
curl --proto '=https' --tlsv1.2 -sSf https://sh.rustup.rs | sh| curl options |
| -f : fail silently (HTTP) |
| -sS : show errors if it fails |
Follow the onscreen instructions to install Rust and use the default suggestion by typing 1.
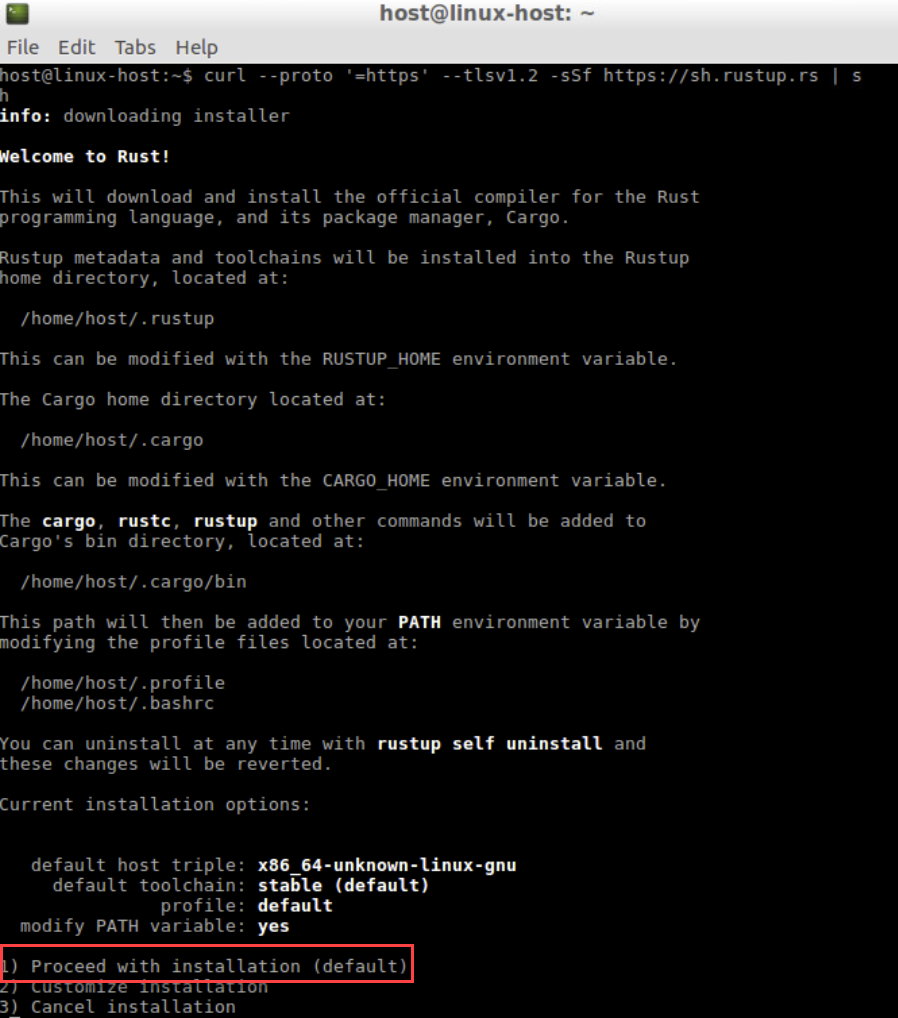
Make sure to set the PATH environment variable as shown in the onscreen instruction:
source $HOME/.cargo/envUse cargo (the rust package manager) to install Routinator.
cargo install --locked routinator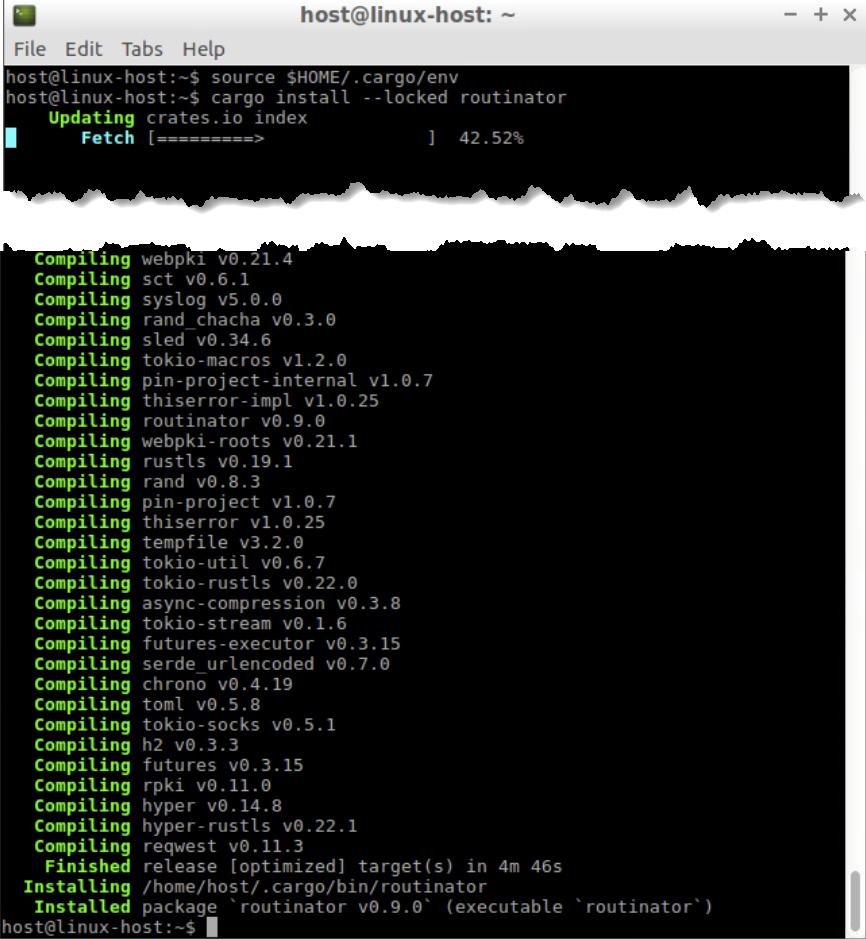
Note: If an error occurs, try installing a previous version by using the command:
cargo install --force routinator --version 0.8.3Initiate the new Routinator. This will prepare both the directory for the local RPKI cache, as well as the directory where the TAL files reside.
routinator init --accept-arin-rpaNote: The extra parameter means that you agree to the ARIN RPA. Make sure to read the agreement before proceeding.
Confirm the five TAL files exist.
ls .rpki-cache/tals/View the contents of the APNIC TAL file.
more .rpki-cache/tals/apnic.tal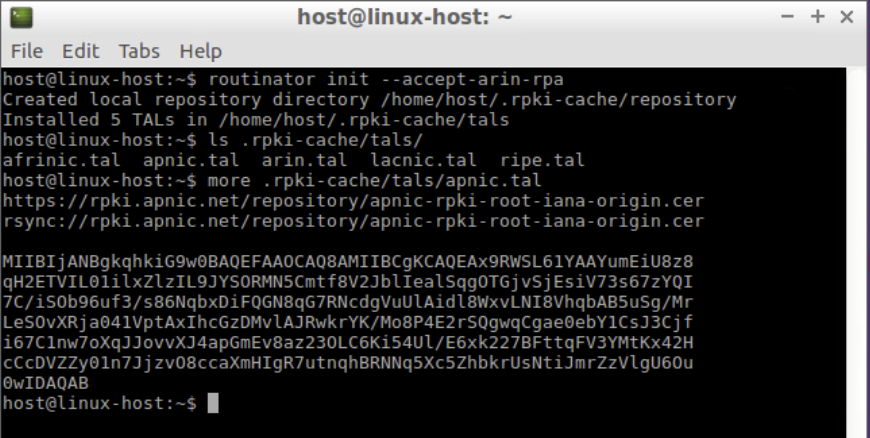
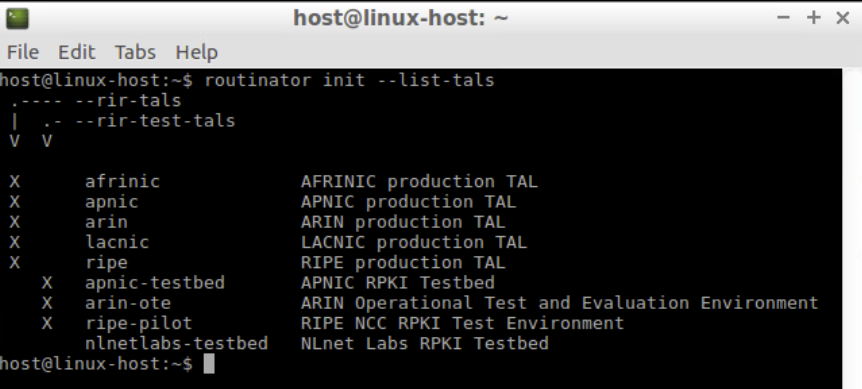
To get an overview of all available TALs use the --list-tals option.
routinator init --list-talsNote: The following commands are new in version 0.9:
--list-tals--rir-tals,--rir-test-tals--tal--skip-tal
View the current/default configuration of Routinator.
routinator config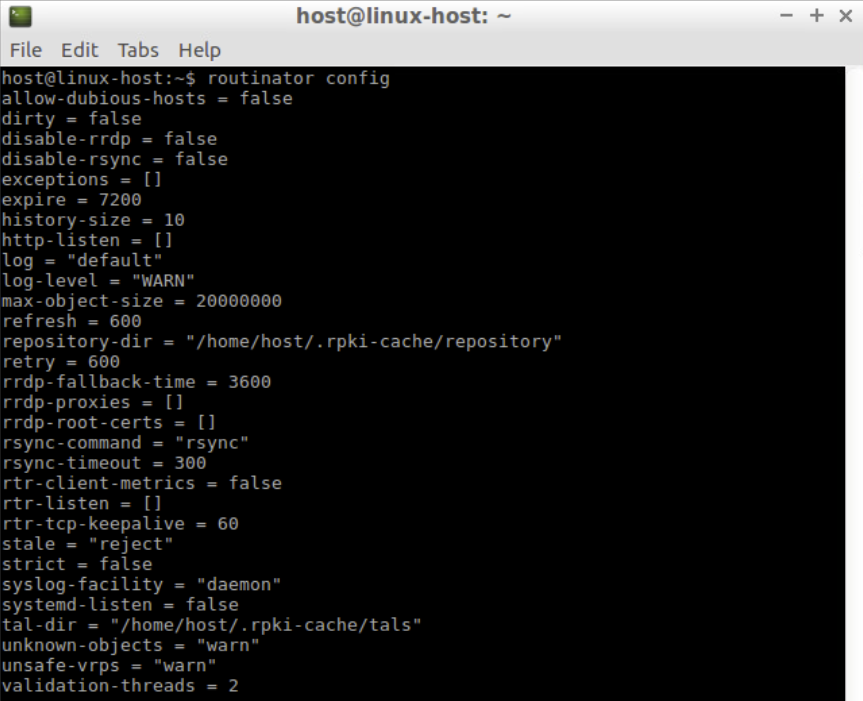
As a test run, use the following command to pull all the validated ROA payloads. Note that this sync process may take some time.
routinator -v vrps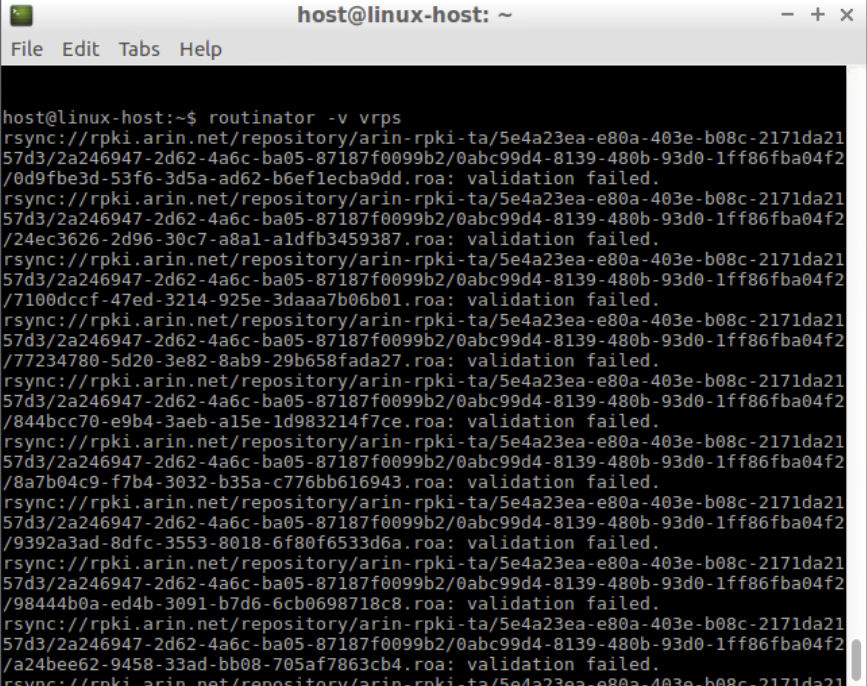
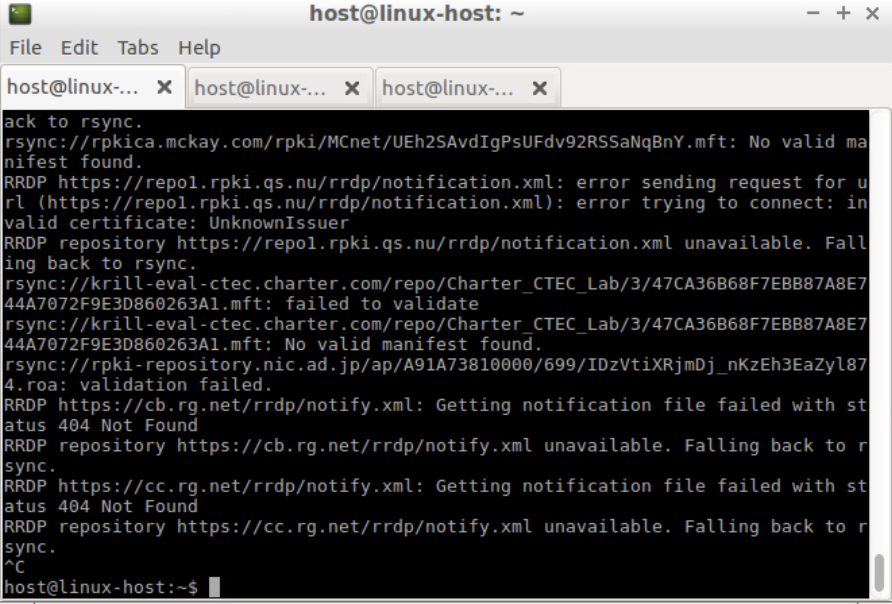
Note: There may be some messages about validation failed or other types of error messages. These can be ignored.
Once the update has finished, a list of Autonomous System numbers (ASNs), IP prefixes, Max Lengths and Trust Anchors will be displayed.
rsyncing from rsync://repository.lacnic.net/rpki/.
rsyncing from rsync://rpki.afrinic.net/repository/.
rsyncing from rsync://rpki.apnic.net/repository/.
rsyncing from rsync://rpki.ripe.net/ta/.
rsync://rpki.ripe.net/ta: The RIPE NCC Certification Repository is subject to Terms and Conditions
rsync://rpki.ripe.net/ta: See http://www.ripe.net/lir-services/ncc/legal/certific ation/repository-tc
rsync://rpki.ripe.net/ta:
Found valid trust anchor rsync://rpki.ripe.net/ta/ripe-ncc-ta.cer. Processing. rsyncing from rsync://rpki.ripe.net/repository/.
Found valid trust anchor rsync://rpki.afrinic.net/repository/AfriNIC.cer. Processing.
rsyncing from rsync://rpki.arin.net/repository/.
Found valid trust anchor rsync://rpki.arin.net/repository/arin-rpki-ta.cer. Processing.
Found valid trust anchor rsync://rpki.apnic.net/repository/apnic-rpki-root-iana-o rigin.cer. Processing.
rsyncing from rsync://rpki.apnic.net/member_repository/.
Found valid trust anchor rsync://repository.lacnic.net/rpki/lacnic/rta-lacnic-rpk i.cer. Processing.
rsync://rpki.ripe.net/repository: The RIPE NCC Certification Repository is subjec t to Terms and Conditions
rsync://rpki.ripe.net/repository: See http://www.ripe.net/lir-services/ncc/legal/ certification/repository-tc
rsync://rpki.ripe.net/repository:
rsyncing from rsync://rpkica.twnic.tw/rpki/. rsyncing from rsync://rpki-repository.nic.ad.jp/ap/. rsyncing from rsync://rpki.cnnic.cn/rpki/.
Summary:
afrinic: 338 valid ROAs, 459 VRPs.
lacnic: 2435 valid ROAs, 7042 VRPs.
apnic: 3186 valid ROAs, 21934 VRPs.
ripe: 10780 valid ROAs, 56907 VRPs.
arin: 4964 valid ROAs, 6621 VRPs. ASN,IP Prefix,Max Length,Trust Anchor AS43289,2a03:f80:373::/48,48,ripe AS14464,131.109.128.0/17,17,arin AS17806,114.130.5.0/24,24,apnic AS59587,151.232.192.0/21,21,ripe AS13335,172.68.30.0/24,24,arin AS6147,190.40.0.0/14,24,lacnic
...
To check the RPKI origin validation status of the BGP announcement, use the validate option.
routinator validate --noupdate --asn 135533 --prefix 61.45.248.0/24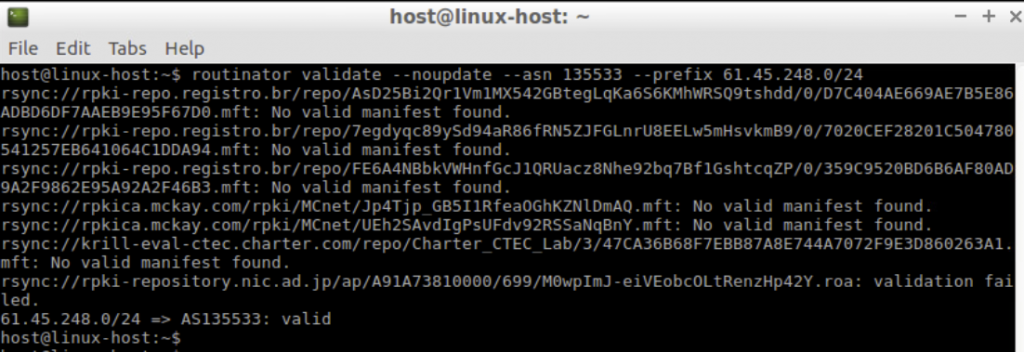
To get the results in json format add the --json option to the command.
routinator validate --noupdate --asn 135533 --prefix 61.45.248.0/24 --json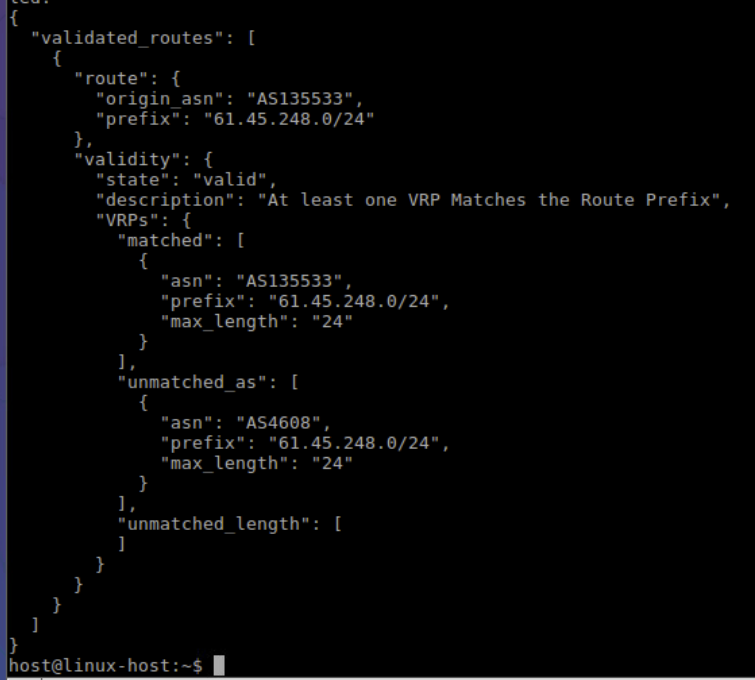
View Routinator’s help.
routinator --helpIn addition to the various validated ROA payloads (VRPs) output formats, Routinator’s HTTP server also provides a user interface, an API, monitoring and logging endpoints, assuming the server’s IP address is in the range of 192.168.30.XX. Use the following command to start the HTTP server:
routinator server --http 192.168.30.XX:8080Note: This service is intended to run on the internal network and doesn’t offer HTTPS natively.
To view the VRP in JSON format authorizing AS135533, open a new terminal window and type the following command:
curl http://192.168.30.XX:8080/json?select-asn=135533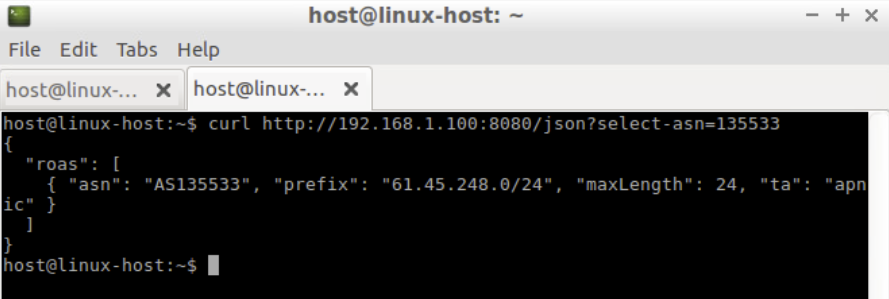
The HTTP server can also be used to view the status and other metrics.
curl --silent http://192.168.30.XX:8080/status | more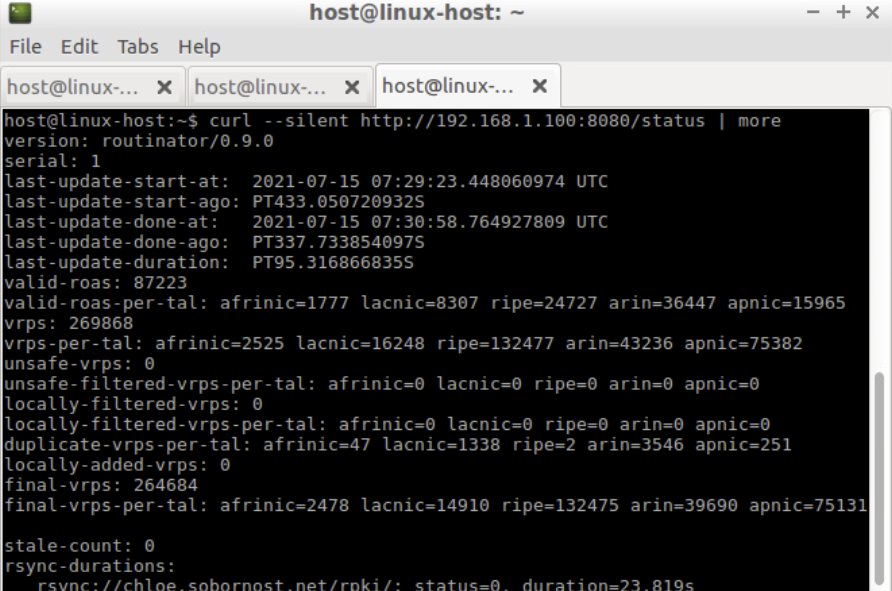
To view the metrics, type the following command:
curl --silent http://192.168.30.XX:8080/metrics | moreUse a browser to open the Routinator HTTP server http://192.168.30.XX:8080 page.
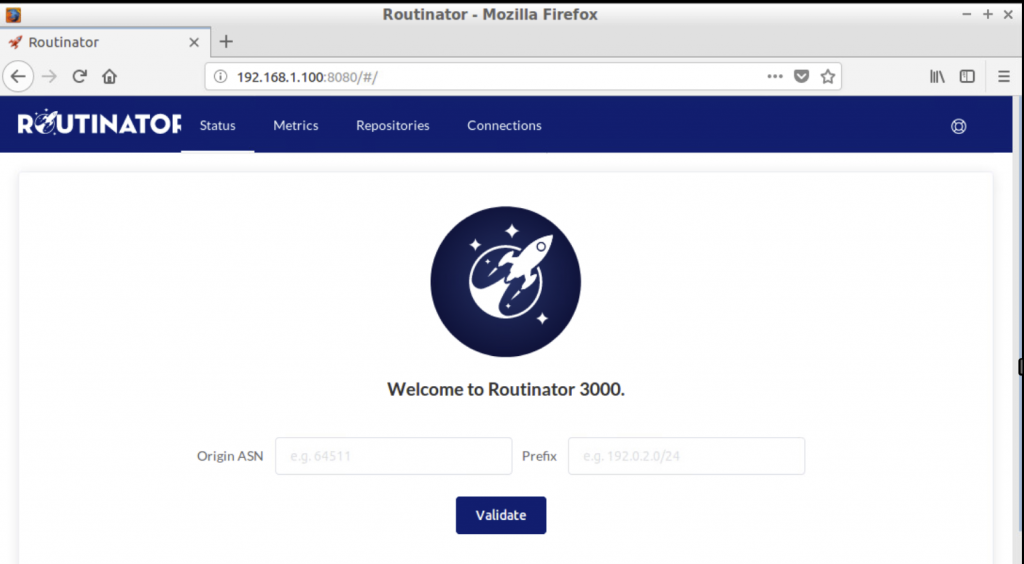
Note: Browse the web interface, then search for ASN: 135533 and Prefix: 61.45.248.0/24
Go back to the terminal window where the Routinator’s HTTP server is running and stop the server by pressing ctrl+c.
Setting up an RTR session — validator side
Routinator can act as an RPKI to Router Protocol (RTR) server to allow RPKI-enabled routers to connect to it and fetch the validated cache (ROA cache).
The Internet Assigned Numbers Authority (IANA) has specified a standard port 323 for the RTR, which would require running Routinator as a root. In the following example we use port 3323, which is greater than 1024, and means Routinator doesn’t need to be logged in as the root.
Run the Routinator as an RTR server listening on port 3323.
To listen to a specific IP address, use:
routinator server --rtr 192.168.30.X:3323 --refresh=900
If you don’t specify the refresh time, by default the local repo will be updated and re-validated every one hour (as per RFC 8210). The example above uses a 15-minute (900secs) refresh time.
Note: If you have IPv6 address configured on Routinator, you can listen on both:
routinator server --rtr 192.168.30.X:3323 --rtr [2001:0DB8::X]:3323 --refresh=900Now the validator is ready to feed the validated cache to BGP speaking routers through the RTR protocol.
Confirm that Routinator is running using the following commands:
ps aux | grep routinator
netstat -tulnp | grep 3323
2. Installing the Fort validator
FORT is a routing security initiative by LACNIC and NIC.MX. It has a few dependencies, including:
- jansson
- libcrypto (LibreSSL or OpenSSL >=1.1)
- rsync
Install the dependencies:
sudo apt-get install -y autoconf automake libjansson-dev libssl-dev pkg-config libcurl4-openssl-dev libxml2-devVerify the OpenSSL version:
openssl version -a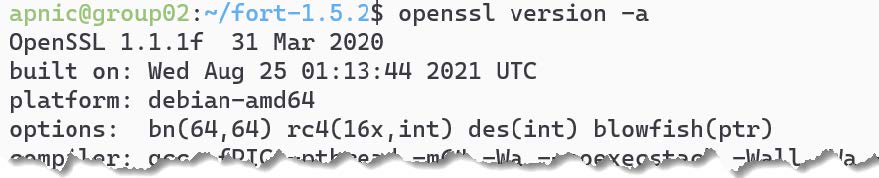
Fetch the source file from the Github repository. Version 1.5.2 was the latest at the time of writing this.
cd ~
wget https://github.com/NICMx/FORT-validator/releases/download/v1.5.2/fort-1.5.2. tar.gz
Extract the files from the tar.gz archive:
tar zxvf fort-1.5.2.tar.gz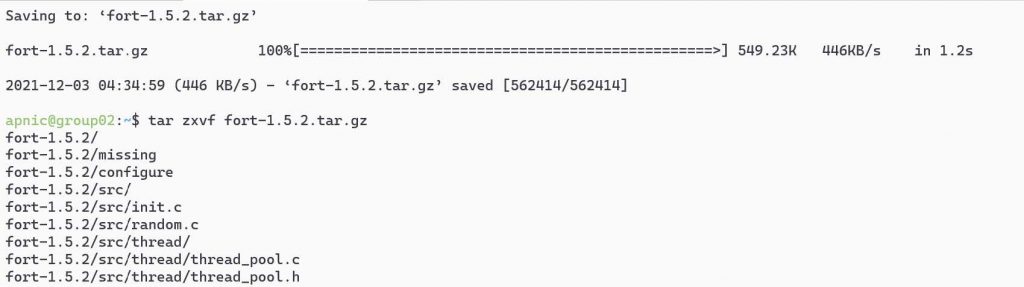
And install:
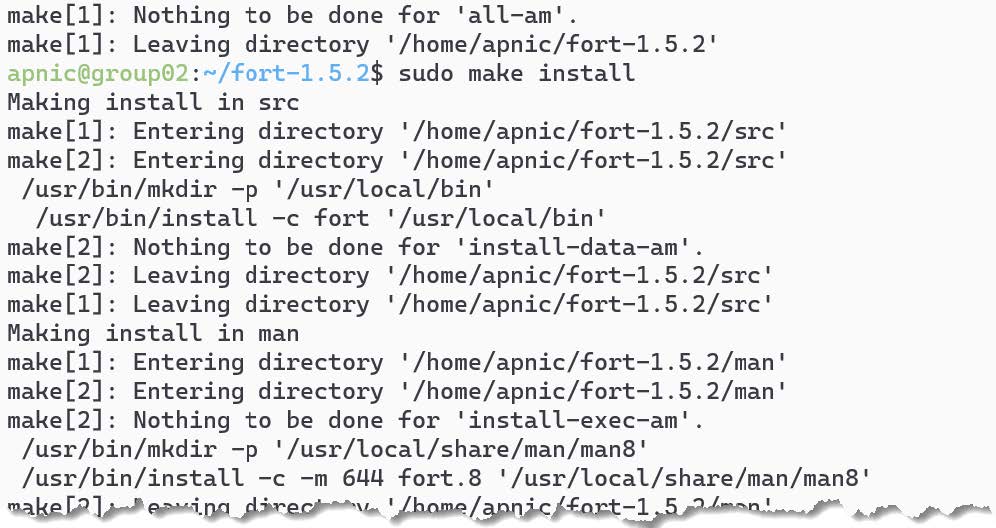
cd fort-1.5.2
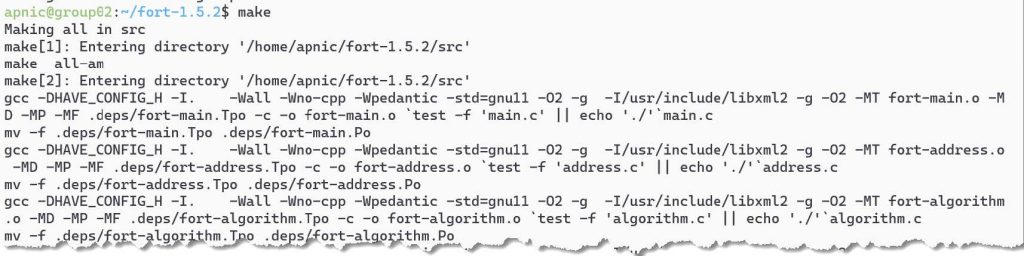
./configure make
sudo make install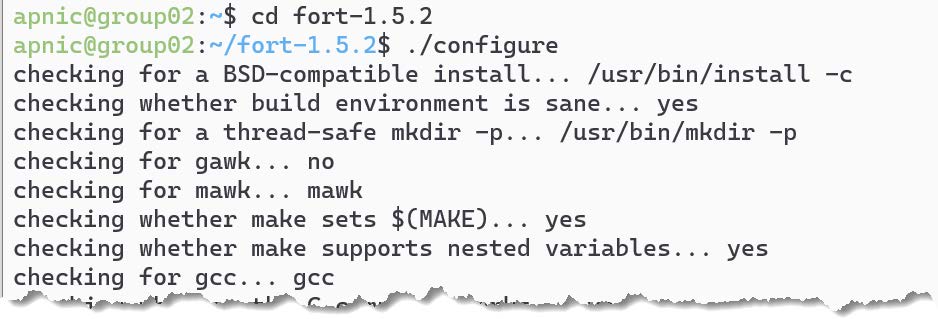
Note: There are other install options listed in the vendor documentation. Also the debian package comes with a systemd service, which allows it to run as a daemon.
Install the five Regional Internet Registry’s (RIR) TALs by downloading the script.
wget https://raw.githubusercontent.com/NICMx/FORT-validator/v1.5.2/fort_setup.sh
chmod 755 ./fort_setup.sh
Create a directory to store the TALs:
mkdir tal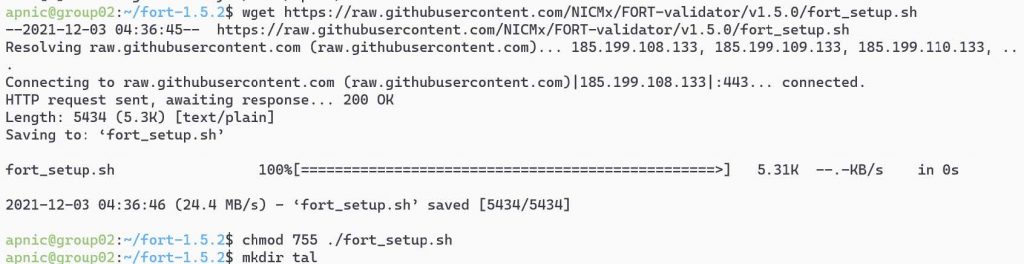
You need to read the ARIN RPA to install the ARIN TAL.
Run the downloaded script:
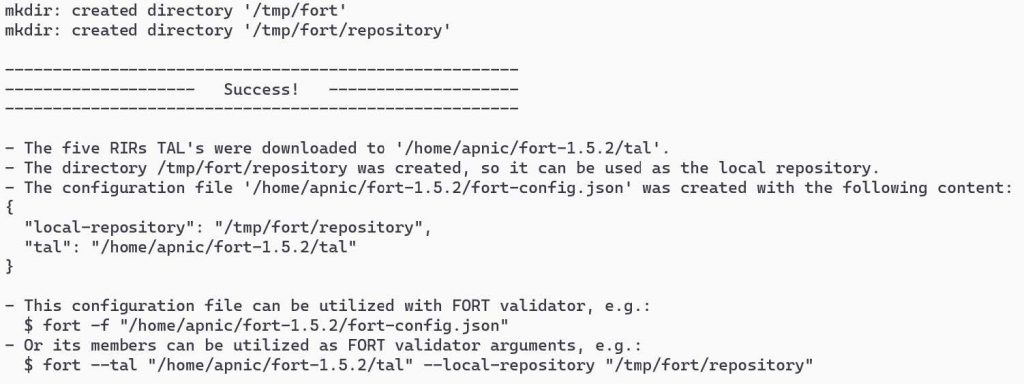
./fort_setup.sh tal/You need to agree/accept ARIN’s RPA. To accept, type yes to continue.

If you get an ERROR 404: Not Found for downloading RIPE TAL, this is because the script may have the wrong name for the RIPE TAL and needs to be updated.

Type the following to update the name and rerun the script:
sed -i 's/ripe/ripe\-ncc/g' fort_setup.sh
./fort_setup.sh tal/
If the script is successful, it should download the five RIR TALs, create the local repo directory, and create the fort-config.json file with a directory path to the TALs and the local repo.
View the FORT configuration file:
cat fort-config.json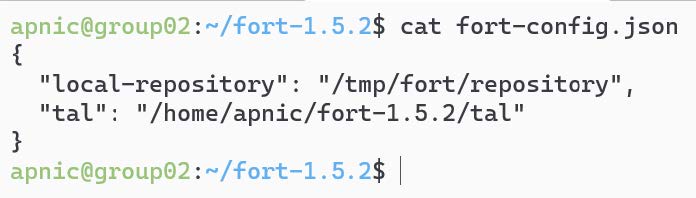
Other options that can be added to the fort-config.json file are:
validation: Time (in seconds) the validator should wait after updating and validating the ROA cache before updating again from the global repo.refresh: Time (in seconds) the RTR client (router) has to wait before trying to poll the validator cache (RFC 8210 default 3,600 seconds).retry: Time (in seconds) the RTR client should wait before retrying after a failed refresh of the cache (RFC 8210 default 600 seconds).expire: Time (in seconds) the RTR client can use its validated ROA cache if it cannot refresh the data, after which it should discard (RFC 8210 default 7,200 seconds).output: Print the validated ROAs to a CSV file.
{
"tal": "/etc/fort/tal",
"server": {
"address": "192.168.30.X",
"port": "8323",
"interval": {
"validation": 900,
"refresh": 900,
"retry": 600,
"expire": 7200
}
},
"output": {
"roa": "/tmp/fort/fort.csv"
}
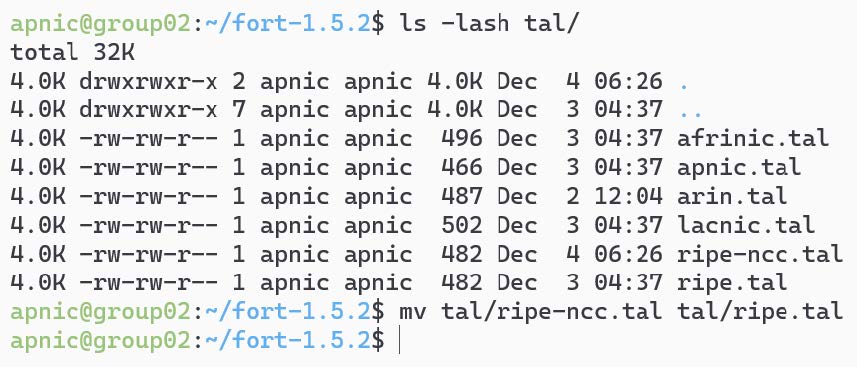
}View the FORT TAL files and rename the rip-ncc.tal to ripe.tal.
ls -lash tal/
mv tal/ripe-ncc.tal tal/ripe.tal
Setting up an RTR session — validator side
Fort can act as an RTR server, to allow RPKI-enabled routers to connect to it and fetch the validated cache (Route Origin Authorization (ROA) cache).
Start the validator (RTR server):
fort -f ./fort-config.json --server.address="192.168.30.1#8323" --output.roa="/tmp/fort/roas.csv" &NOTE: If you see a message about ERR: Waiting thread to start, rerun the above command.
The RTR server 192.168.30.1 is listening on port 8323 and is printing the validated ROA payload (VRP) to an output file /tmp/fort/roas.csv.
The validator is ready to feed the validated cache to BGP speaking routers through the RTR protocol.
Confirm FORT is running:
ps aux | grep fortBy default, FORT stores a local cache of the repository at /tmp/fort/repository. You can also view the validated ROA cache in /tmp/fort/roas.csv .
The timers can be tweaked to suit your need — refer to RFC 8210.
3. Installing RPKI-Prover
RPKI-Prover is a routing security initiative written in the Haskell programming language. To get started, install the required software:
sudo apt-get install -y screen net-tools curl git rsync \
libz-dev libexpat1-dev liblmdb-dev liblzma-dev libgmp-dev libffi-dev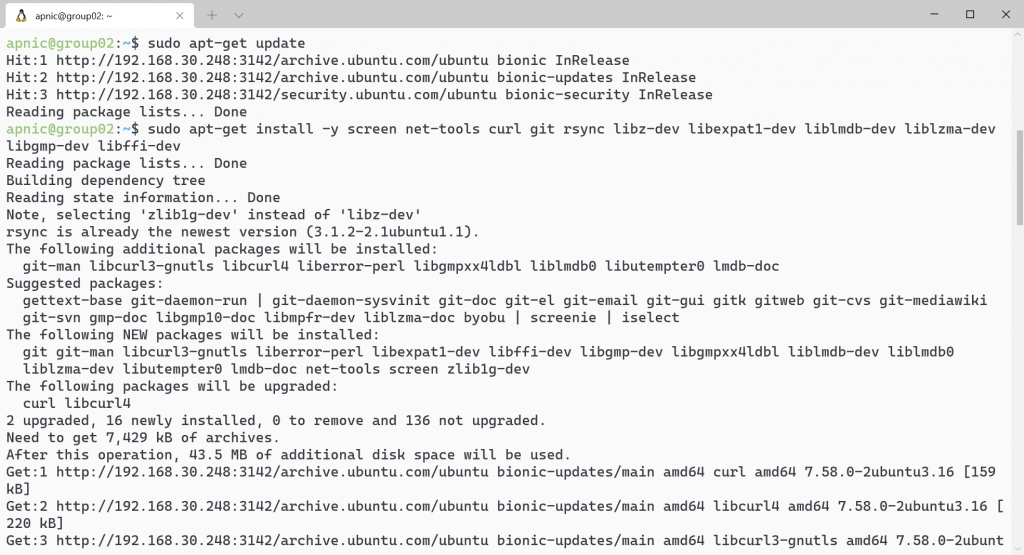
Download and install Stack:
curl -sSL https://get.haskellstack.org/ | sh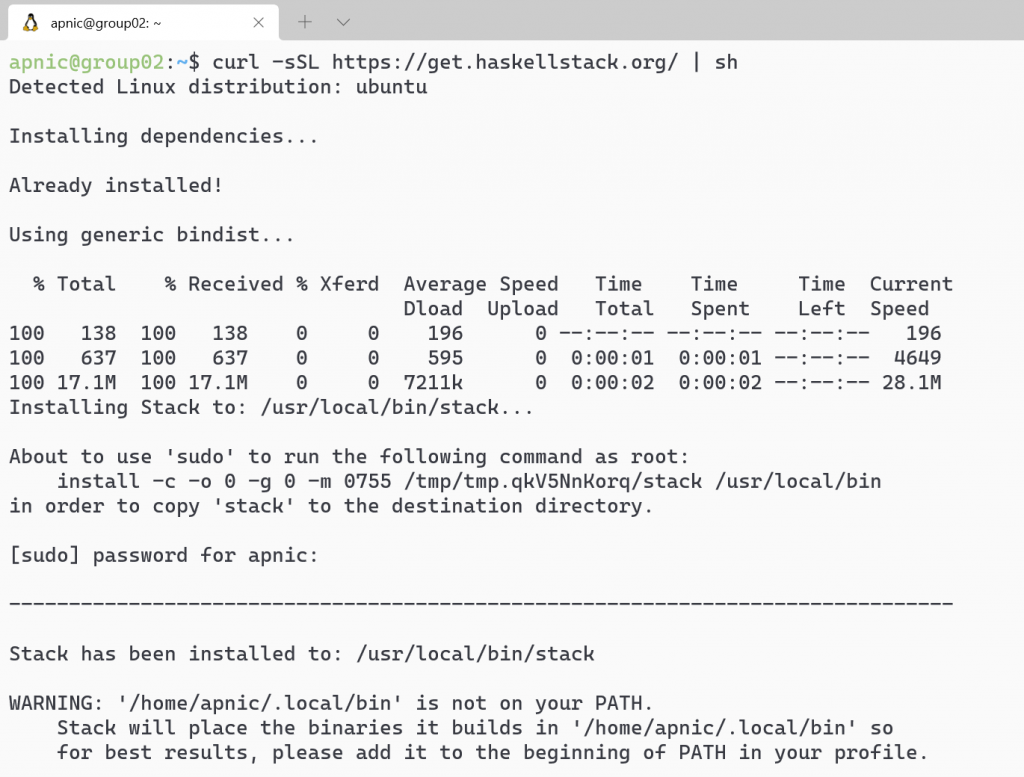
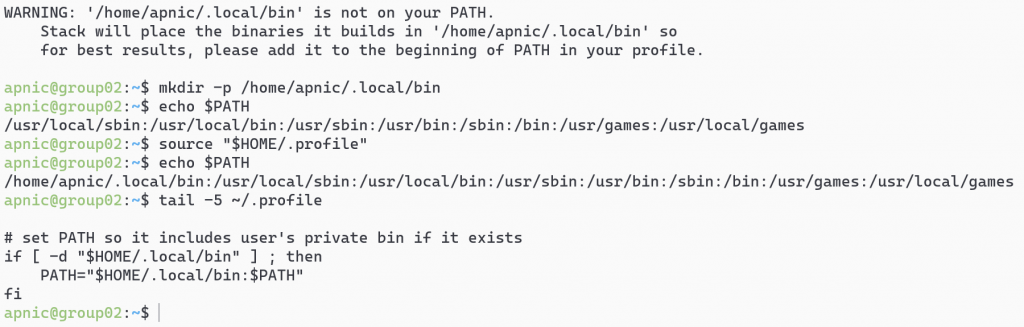
Optional: Add ~/.local/bin to the path variable:
mkdir -p /home/apnic/.local/bin
echo $PATH
tail -5 ~/.profile
source "$HOME/.profile
echo $PATH
Download the RPKI-Prover github repository:
git clone https://github.com/lolepezy/rpki-prover.git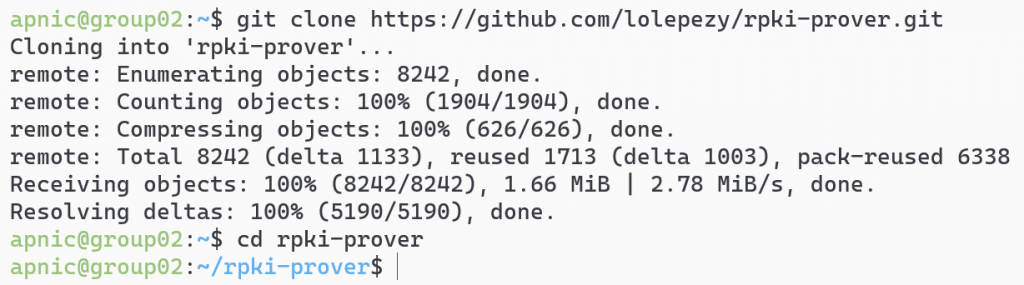
Install RPKI-Prover:
cd rpki-prover
stack install rpki-prover:rpki-prover
Note: Please be patient as this will take a long time to complete.
Create the folder structure to store the cache and TAL files:
sudo ./mkdirs.sh /etc/rpki-prover
ls -lash /etc/rpki-prover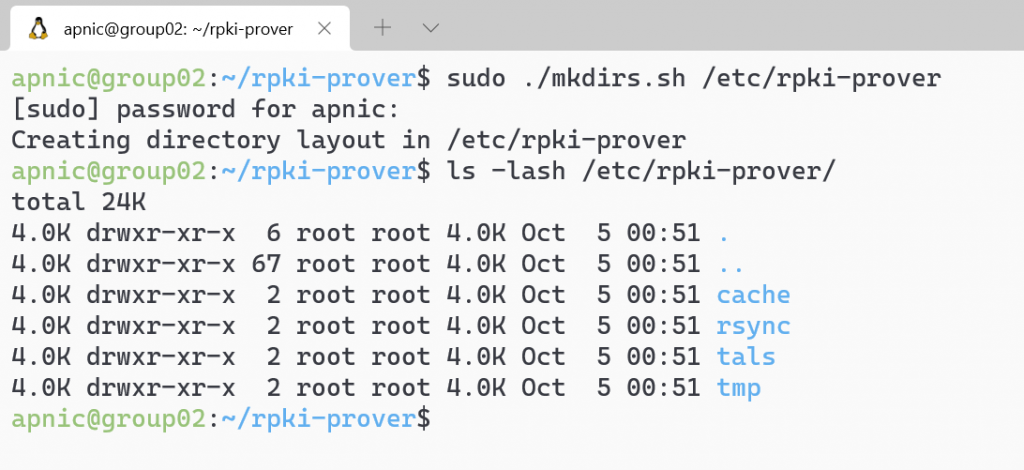
View RPKI-Prover’s help:
rpki-prover --help
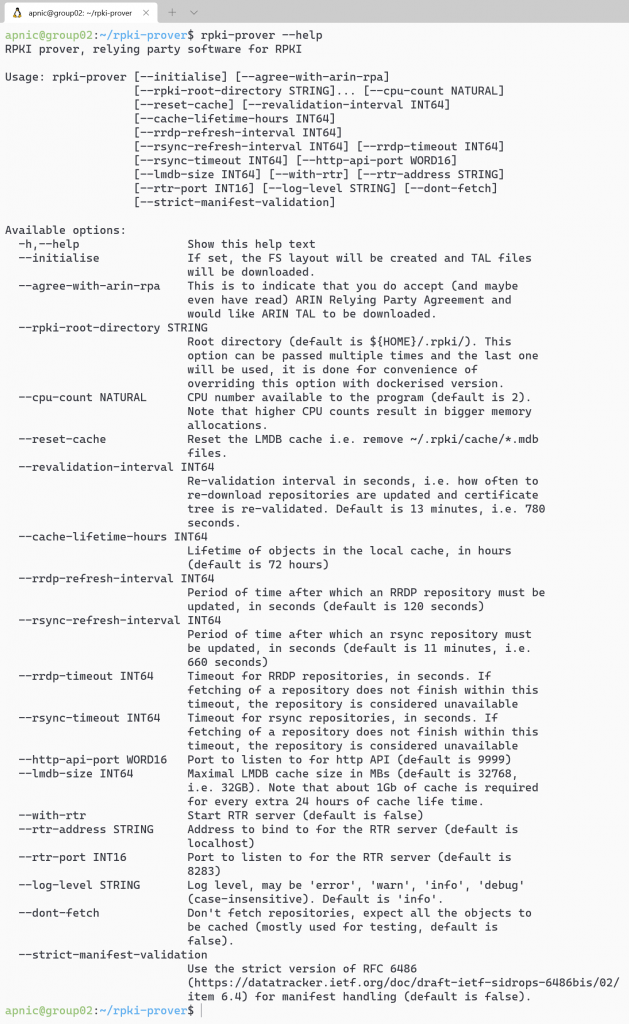
Note: If this command doesn’t work, it’s because the path is not up to date. Try this command ~/.local/bin/rpki-prover --help.
Enable a screen session and start RPKI-Prover and accept the ARIN TAL agreement:
screen
sudo ~/.local/bin/rpki-prover --rpki-root-directory \
/etc/rpki-prover --agree-with-arin-rpa
Note: Make sure you read the ARIN RPA before proceeding.
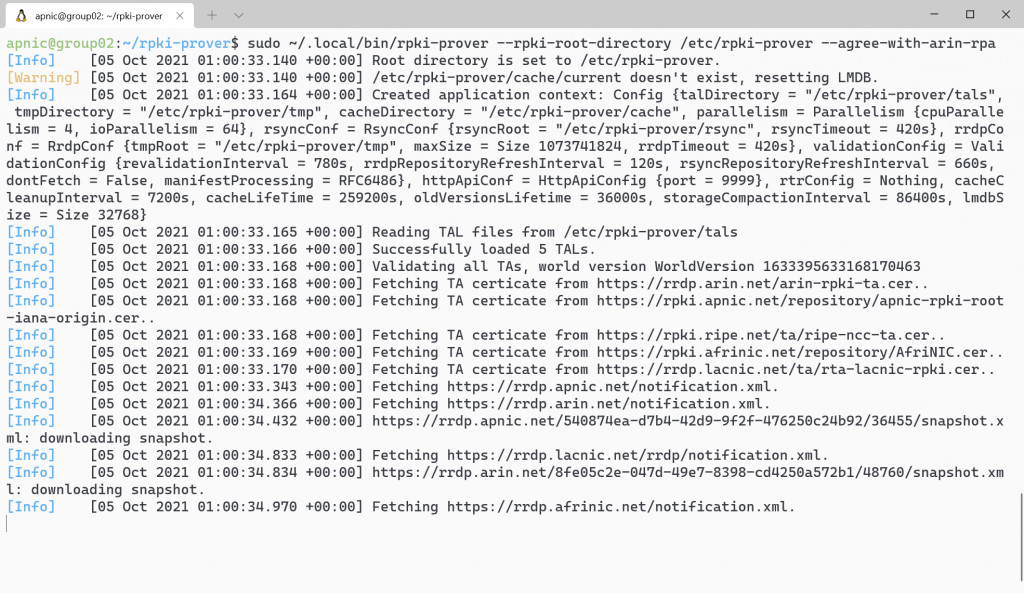
This will take approximately 15 minutes to update. Wait until the message Validated all TAs appears before proceeding to the next step.

Note: There may be some messages about validation failed or other types of error messages. These can be ignored.
Detach from the screen session by pressing Ctrl+a d and confirm the system is listening on port 9999:
netstat -ltnp
netstat -ltnp | grep 9999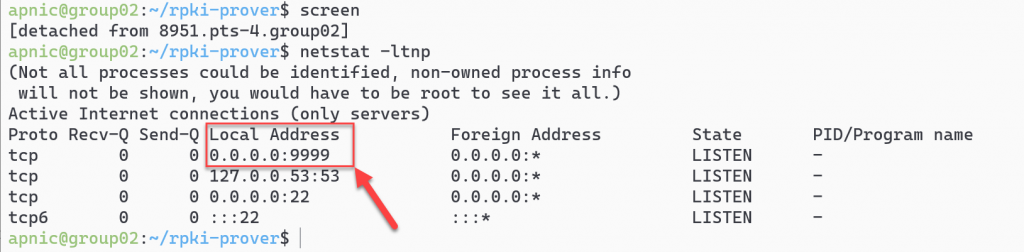
Export the list of validated ROAs to a file:
curl -s http://localhost:9999/api/vrps.csv | tee ~/rpki-prover-vrps.csv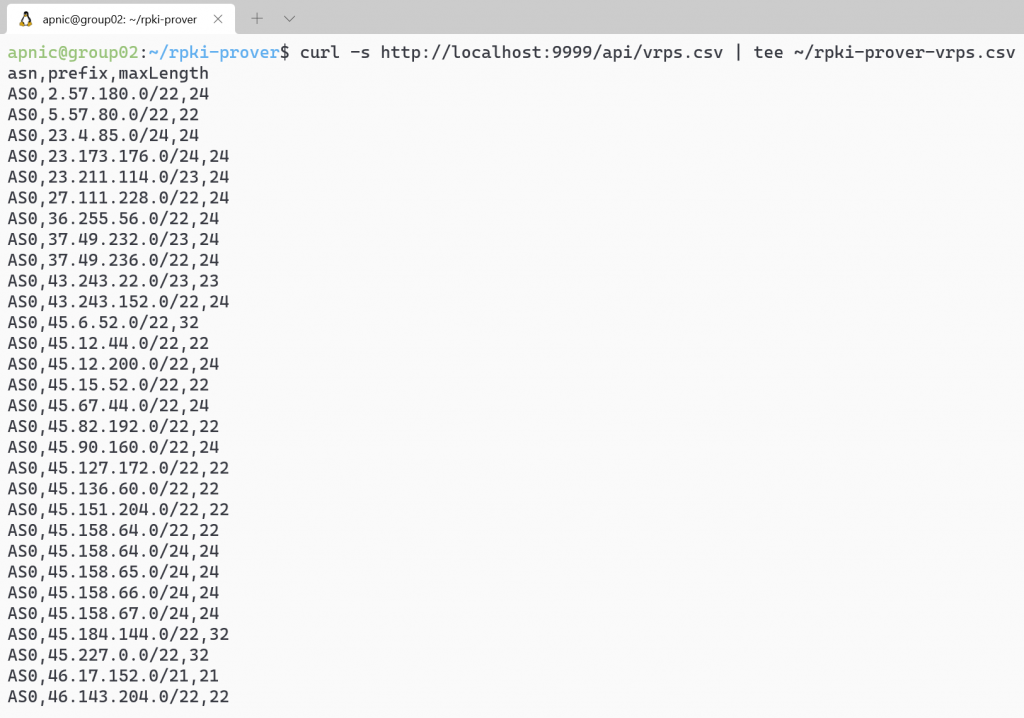
View the first 10 validated ROA payloads:
head ~/rpki-prover-vrps.csv
A list of ASNs, IP prefixes and Max Lengths will be displayed.
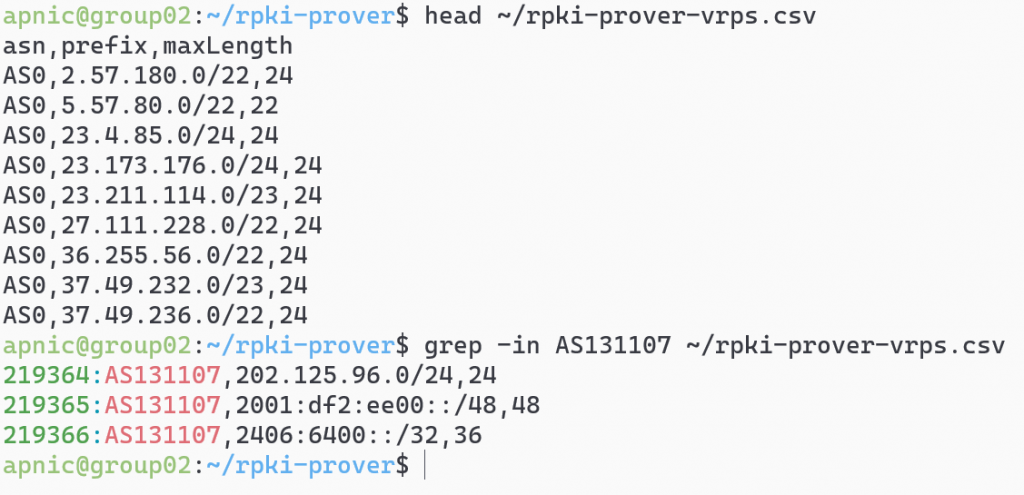
To search for ROAs for APNIC Training’s AS131107, use:
grep -in AS131107 ~/rpki-prover-vrps.csv
Stop RPKI-Prover. Reattach to the screen session and end the process by pressing Ctrl+c:
screen -r
ctrl+c
exit
Setting up an RTR session — validator side
RPKI-Prover can act as an RTR server, to allow RPKI-enabled routers to connect to it and fetch the validated cache (ROA cache).
IANA has specified that a standard port RPKI-Prover uses the default port 323 for RTR, which would require running RPKI-Prover as the root. Prover uses the default port 8283.
To run RPKI-Prover as an RTR server listening on 192.168.30.X and the port 3323, use:
sudo ~/.local/bin/rpki-prover --rpki-root-directory \
/etc/rpki-prover --agree-with-arin-rpa --with-rtr --rtr-address 192.168.30.X \
--rtr-port 3323 --revalidation-interval 900 &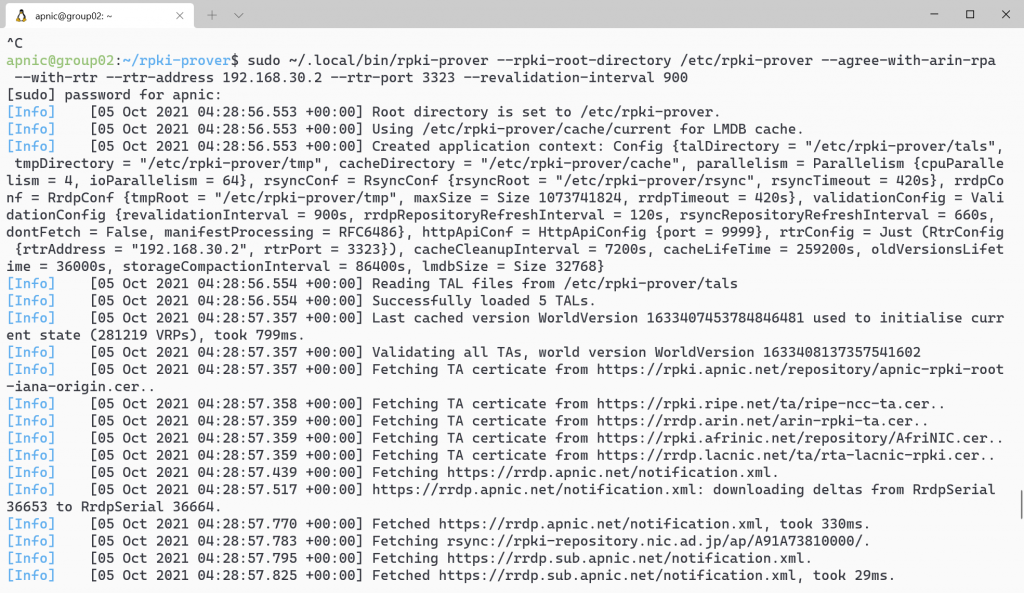
If you don’t specify the revalidation-interval time, by default the local repo will be updated and revalidated every 13 minutes (RFC 8210 specifies one hour). The example above uses a 15-minute (900secs) refresh time.
Note: If an IPv6 address is configured on RPKI-Prover, you can listen on both by starting another RPKI-Prover process listening on another http API port, such as port 9998:
sudo ~/.local/bin/rpki-prover --rpki-root-directory /etc/rpki-prover \
--agree-with-arin-rpa	--with-rtr --rtr-address 2001:0DB8::X \
--rtr-port 3323 --revalidation-interval 900 --http-api-port 9998 &
Confirm that RPKI-Prover is running using the following commands:
ps aux | grep rpki-prover
netstat -tulnp | grep 3323
For more detail refer to: https://github.com/lolepezy/rpki-prover.
If you have any questions on the above, please leave a comment below and we’ll answer it inline so that others with similar questions can see.
The views expressed by the authors of this blog are their own and do not necessarily reflect the views of APNIC. Please note a Code of Conduct applies to this blog.
Please note that for most use cases, using a binary package to install Routinator will be more convenient than building from the source. Packages are available for Debian/Ubuntu and RHEL/CentOS/Rocky. Docker is an option as well.
https://routinator.docs.nlnetlabs.nl/en/stable/installation.html