

Whether by fat-finger, malice, or otherwise, route leaks and hijacks can cause havoc on the Internet. And since routing is more or less a chain of rumours with no single authority, there is no exact reference for identifying ‘bad’ routing updates (as much as we might like the April Fools’ Day RFC 3514 to be true). All we can do as network operators is attempt to identify which updates are good.
How can RPKI help?
Using RPKI, we can validate who has the authority to route which resources via a Route Origin Authorization (ROA). Unlike routing, Resource Public Key Infractrusture (RPKI) does have an authority model, so trust can be established, which is the first step towards being able to reliably identify good routing updates.
RPKI is a public key infrastructure framework, so when an address holder allocates resources to an end holder, they also issue a certificate (based on X.509 standards) that binds the resources with the end holder’s public key, all signed by the issuer’s private key (Trust Anchor). This allows the end holder to attest custodianship and other status information regarding a particular Internet number resource. These authorities can be validated against the Trust Anchor (up the chain of trust).
The single authority model and certification hierarchy of RPKI can be leveraged to perform Route Origin Validation (ROV) using ROAs.
A ROA lists the prefixes that an ASN is authorized to announce, meaning that it can authoritatively prove who is the legitimate custodian of an address and identify which ASNs have the permission of the custodian to originate that address. Once validated, a ROA can be used to generate route filters. This can help prevent route hijacks where a prefix is originated by an AS without authorization, and can help prevent prefixes from being mistakenly mis-originated.
Step 1: Activating the RPKI engine
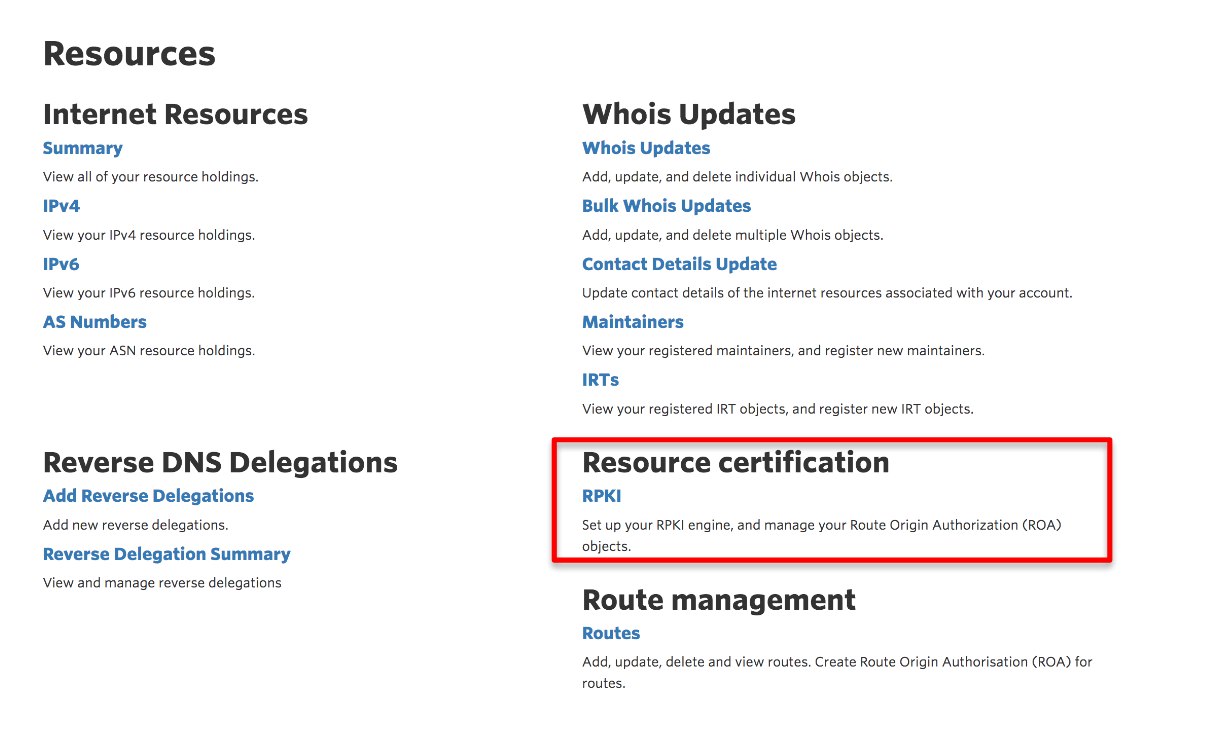
To certify the resources under a particular account, you first need to activate the RPKI engine in MyAPNIC. Once you have logged in to MyAPNIC, select Resources from the menu bar, then choose RPKI, listed under Resource certification. Activate the RPKI engine.
Step 2: Creating a ROA
Now you’re ready to create a ROA to implement RPKI ROV.
In your MyAPNIC portal, go to Resources and choose Routes, under Route Management.
In this area you should see a list of your existing routes. Here we see the APNIC Training account, which shows our two transit ASes; AS 45192 and 131107 and their associated IPv4 and IPv6 prefixes. We also have other ASes for multihoming purposes.
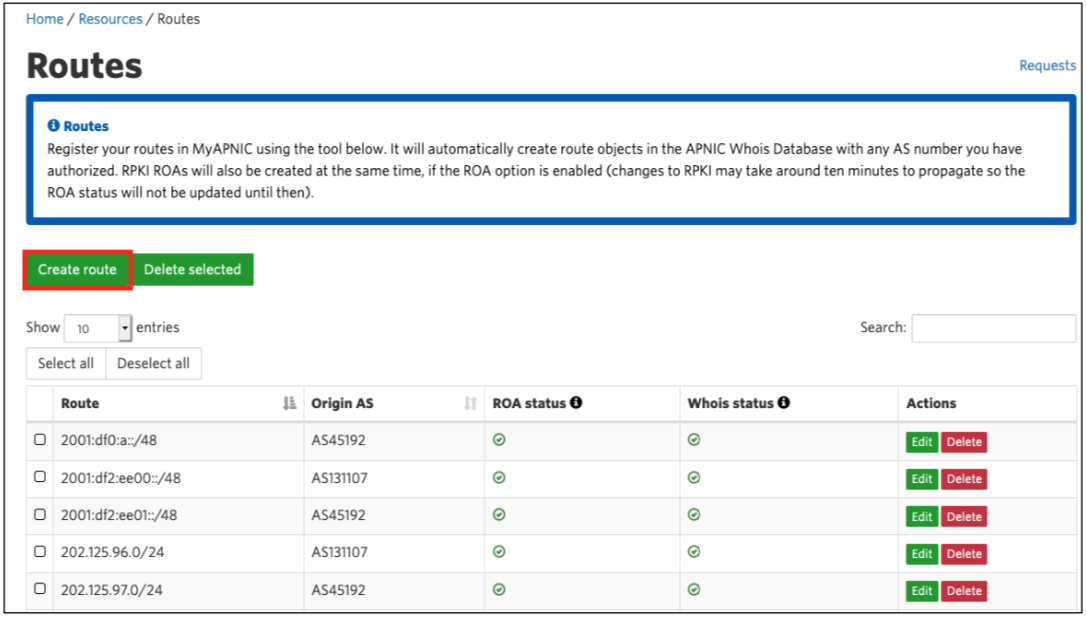
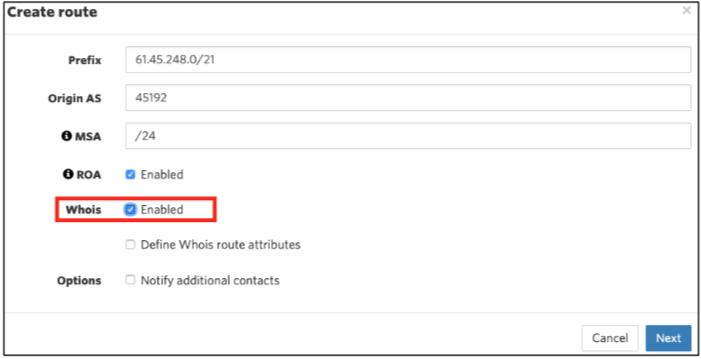
Creating a ROA is as simple as selecting Create route and specifying the:
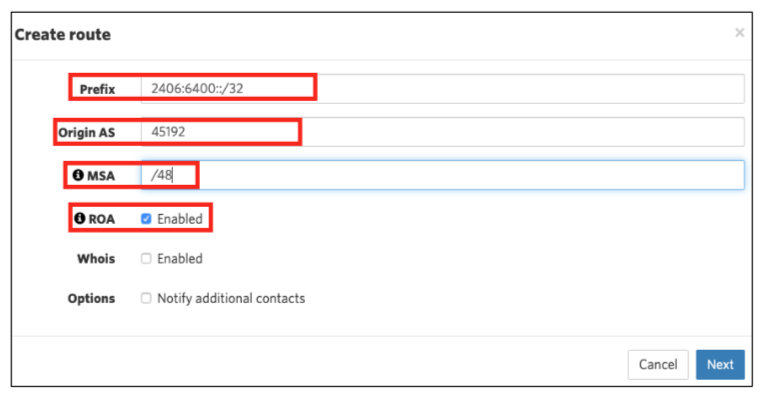
- Prefix
- Origin AS
- Most Specific Announcement (MSA) — this is the smallest sub-route (sub-aggregate) announcement your ROA will cover. Note that if you advertise/announce a smaller prefix than this MSA, if will be seen as invalid to anyone doing origin validation, so think about your future use and make sure that this value covers all your actual announcements.
- Whois (optional). Selecting this option allows you to create route(6) objects along with your ROA. If you select this option, the distance between the MSA and prefix length must be 8 bits or less. For example, if you have a /32 IPv6 prefix and opt to enable the whois option, then your MSA is limited to /40. This limit does not apply if you only select the ‘ROA’ option
- ROA
The figures below show the route creation process for:
- IPv6 with the whois option deselected
- IPv4 with the whois option selected
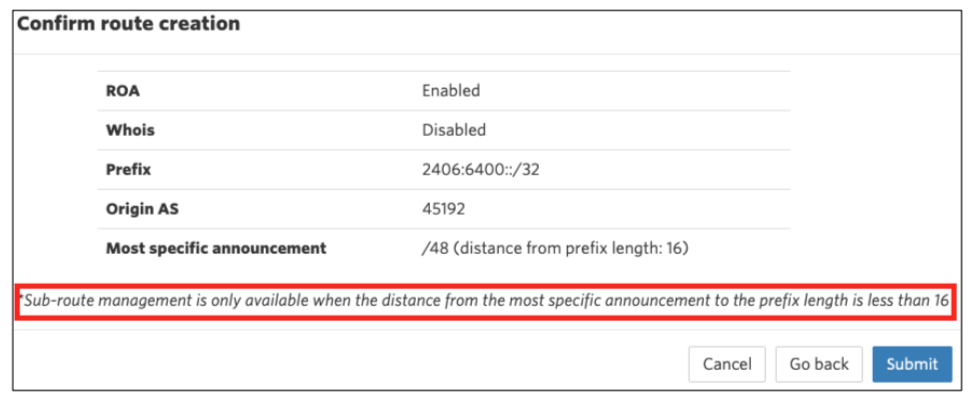
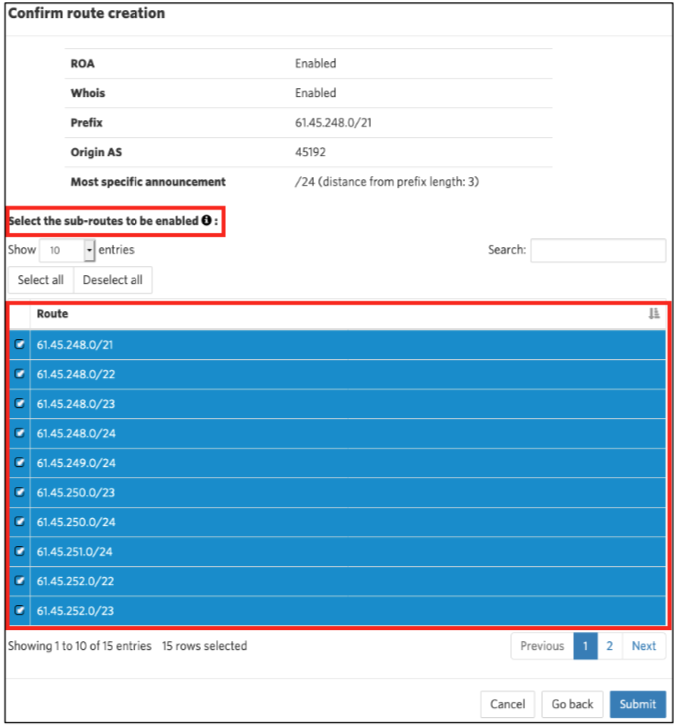
Once you’ve clicked Next, and selected any sub-routes (if applicable), you’re ready. Click Submit to complete the process.
So that’s it! Your ROA is created. Once you have created your ROA, APNIC’s system will publish your ROA into the global RPKI repository.
Note, only the custodian of the prefix can do this. If your upstream says, “hey, can you please authorize me to advertise your prefix?”, only you can to do it by creating a ROA with their ASN included.
Step 3: Checking your ROA
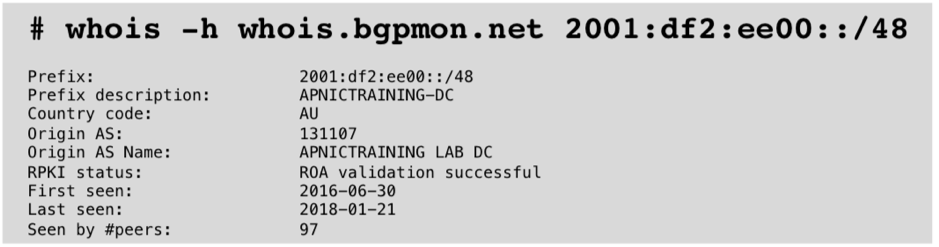
There are many ways to check whether your ROA has been published. I tend to prefer NTT’s routing registry database. I can issue a simple whois command, which points to NTT’s routing registry and then check my prefix.

The whois result shows there is a ROA profile for this prefix and the origin is AS 131107. This prefix was delegated by APNIC, so it is listed as the Trust Anchor.
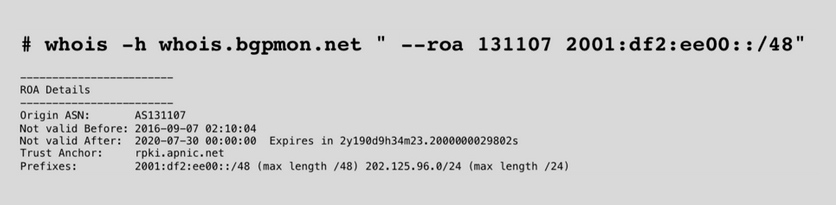
You can also use BGPMon to check your ROA.
If you want to match a prefix and the AS, you can use this command and it will tell you whether it’s valid or not.
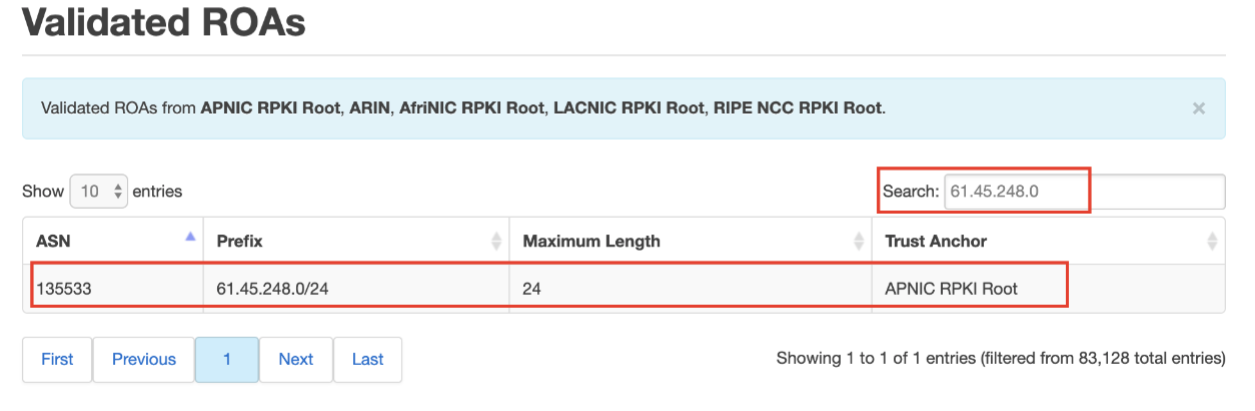
If you’d rather not use the command line, you can use APNIC’s RPKI Validator by searching for a specific prefix to see if it is validated.
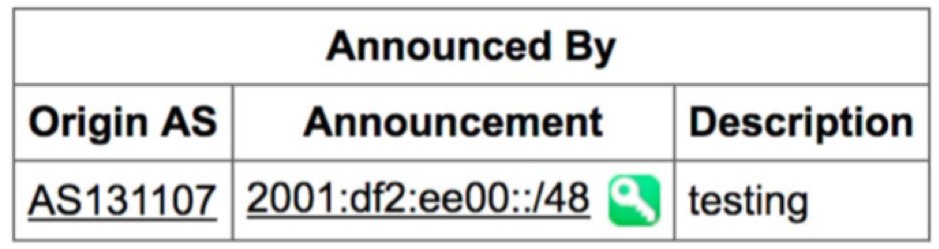
Hurricane Electric also hosts a tool at https://bgp.he.net. The green key indicates that your ROA was created and has propagated into the global repository.
If you want more information on creating ROAs, a detailed management guide is available.
To learn about the next steps in deploying RPKI for ROV, such as deploying a validator and configuring your routers, head over to the full RPKI Webinar at the APNIC Academy, or take a look at the APNIC Training schedule for workshops in your area. If you don’t see an upcoming workshop near you, reach out to training@apnic.net for remote assistance.
This post is the first in a series of ‘how to’ posts on RPKI Route Origin Validation (ROV). See also:
The views expressed by the authors of this blog are their own and do not necessarily reflect the views of APNIC. Please note a Code of Conduct applies to this blog.
informative post.
thanks for sharing the info.
Very good.