

Let’s go step-by-step and do some basic live process forensics for Linux. Today’s attack is a bind shell backdoor waiting for a connection on Ubuntu.
Simulated bind shell attack
If you want to simulate the attack in this post, you can use the netcat command, which opens a TCP port on 31337 but sends all data to /dev/null instead of a real shell. The commands below delete the binary as well after it starts so you can experiment with recovering the deleted process binary.
cd /tmp
cp /bin/nc /tmp/x7
./x7 -vv -k -w 1 -l 31337 > /dev/null &
rm x7
Suspicious network port spotted
In our example we saw something odd when we ran:
netstat -nalp
netstat shows a process named ‘x7′ PID with a listening port that we don’t recognize.
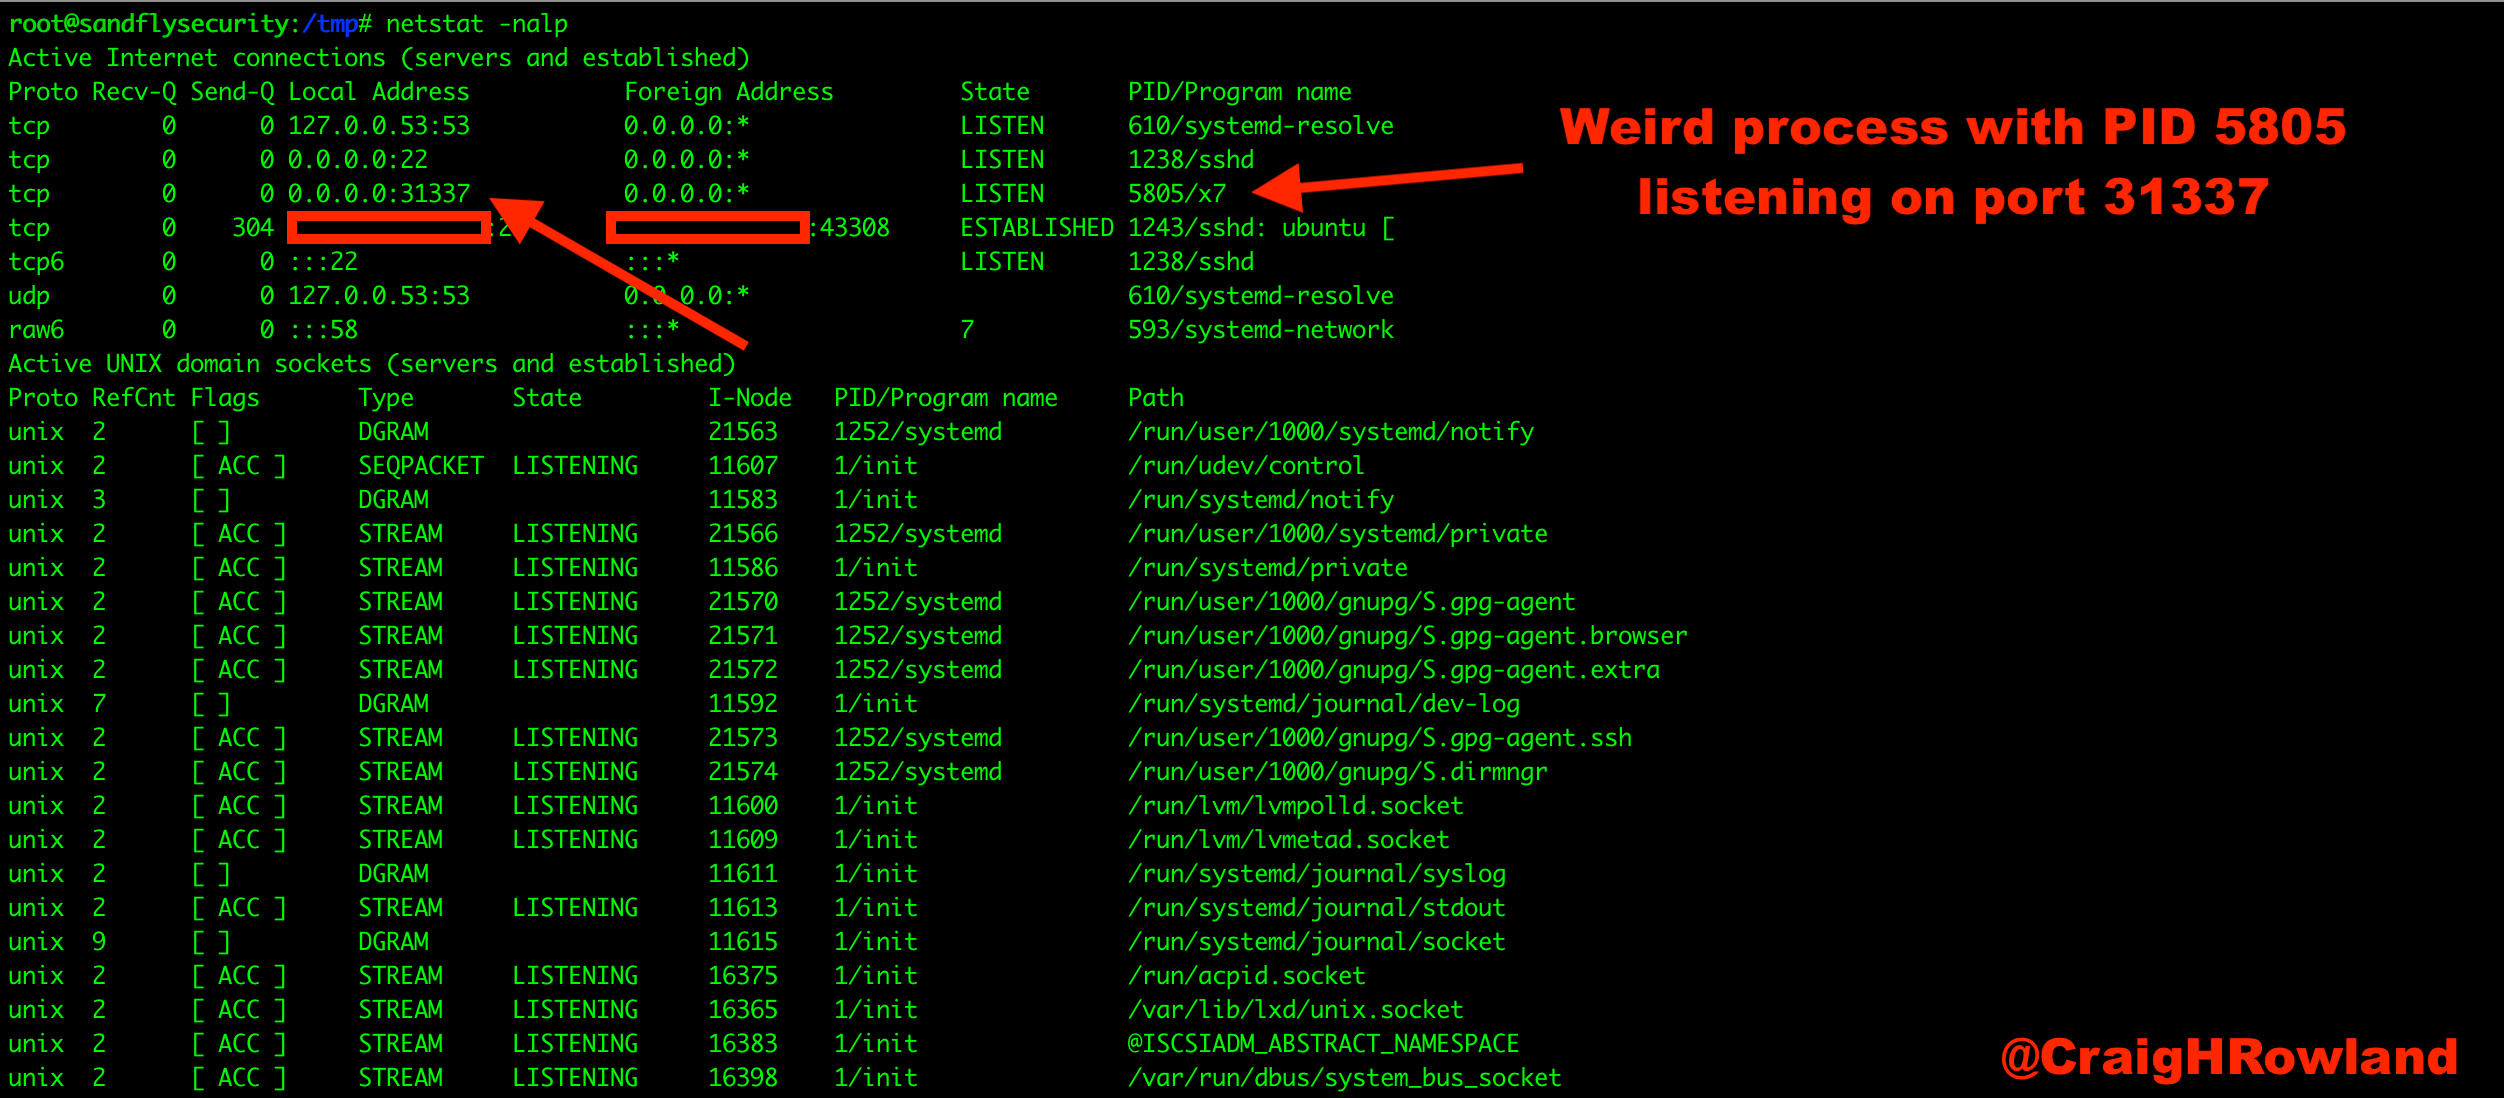
Figure 1 — Linux bind shell suspicious port.
Obtain /proc listing for suspicious process ID
The first thing we’ll do is list out the Process ID (PID) under /proc/<PID> to see what is going on. Our PID of interest is 5805:
ls -al /proc/5805
Below we see a couple of odd things.
- The current working directory (cwd) is /tmp.
- The binary was in /tmp, but was deleted.
A lot of exploits work out of /tmp and /dev/shm on Linux. These are both world writable directories on almost all Linux systems and many malware and exploits will drop their payloads there to run. A process that is making its home in /tmp or /dev/shm is suspicious.
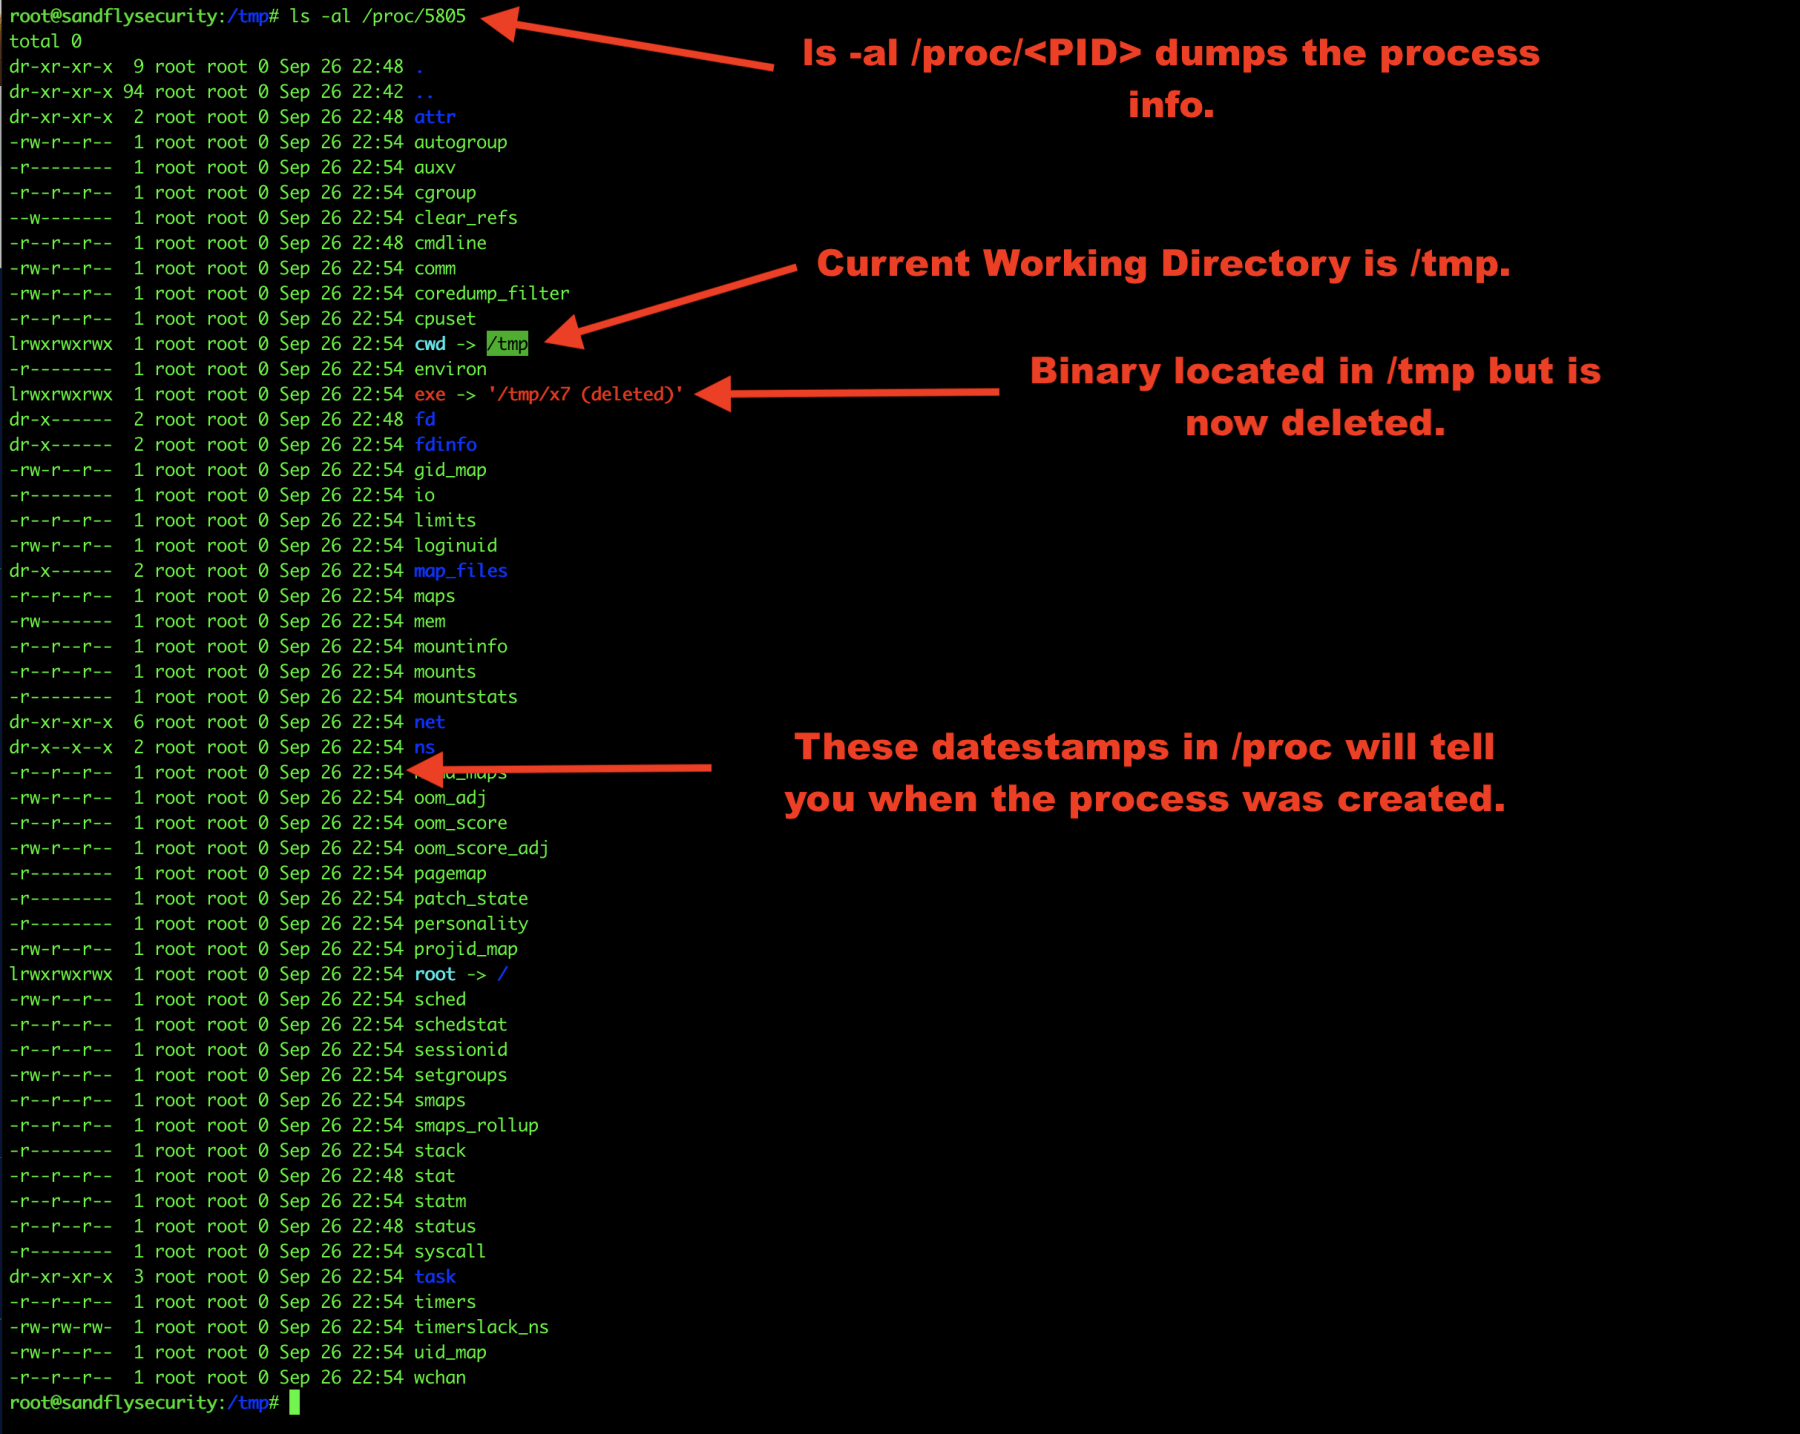
Figure 2 — Linux process forensics /proc listing.
Recover deleted Linux malware binary
Before we do anything else, we’ll recover the deleted binary. As long as the process is still running, it is very easy to recover a deleted process binary on Linux:
cp /proc/<PID>/exe /tmp/recovered_bin
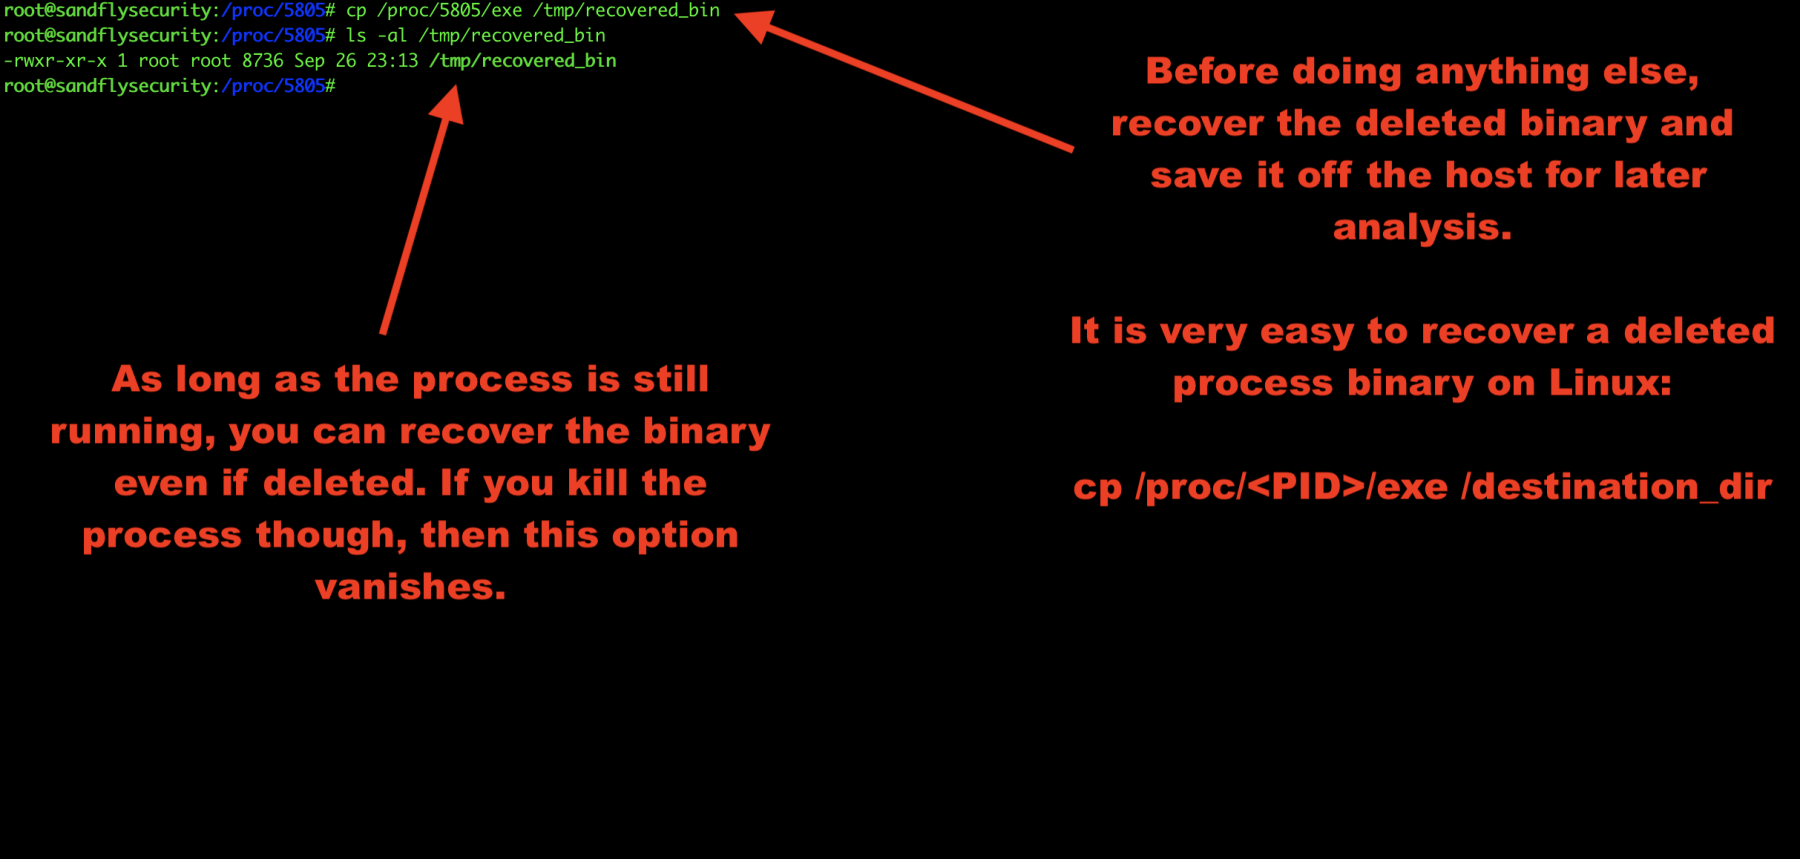
Figure 3 — Recovering deleted malware process binary on Linux.
Obtain deleted Linux malware hashes
Now that we’ve saved the Linux binary somewhere off the system, we can recover the hashes easily.
If you are using netcat to simulate the attack, you can recover the deleted binary and run a hash on the system netcat command and the recovered binary and see they match.
sha1sum /bin/nc
<hash here>
sha1sum /tmp/recovered_bin
<identical hash here>
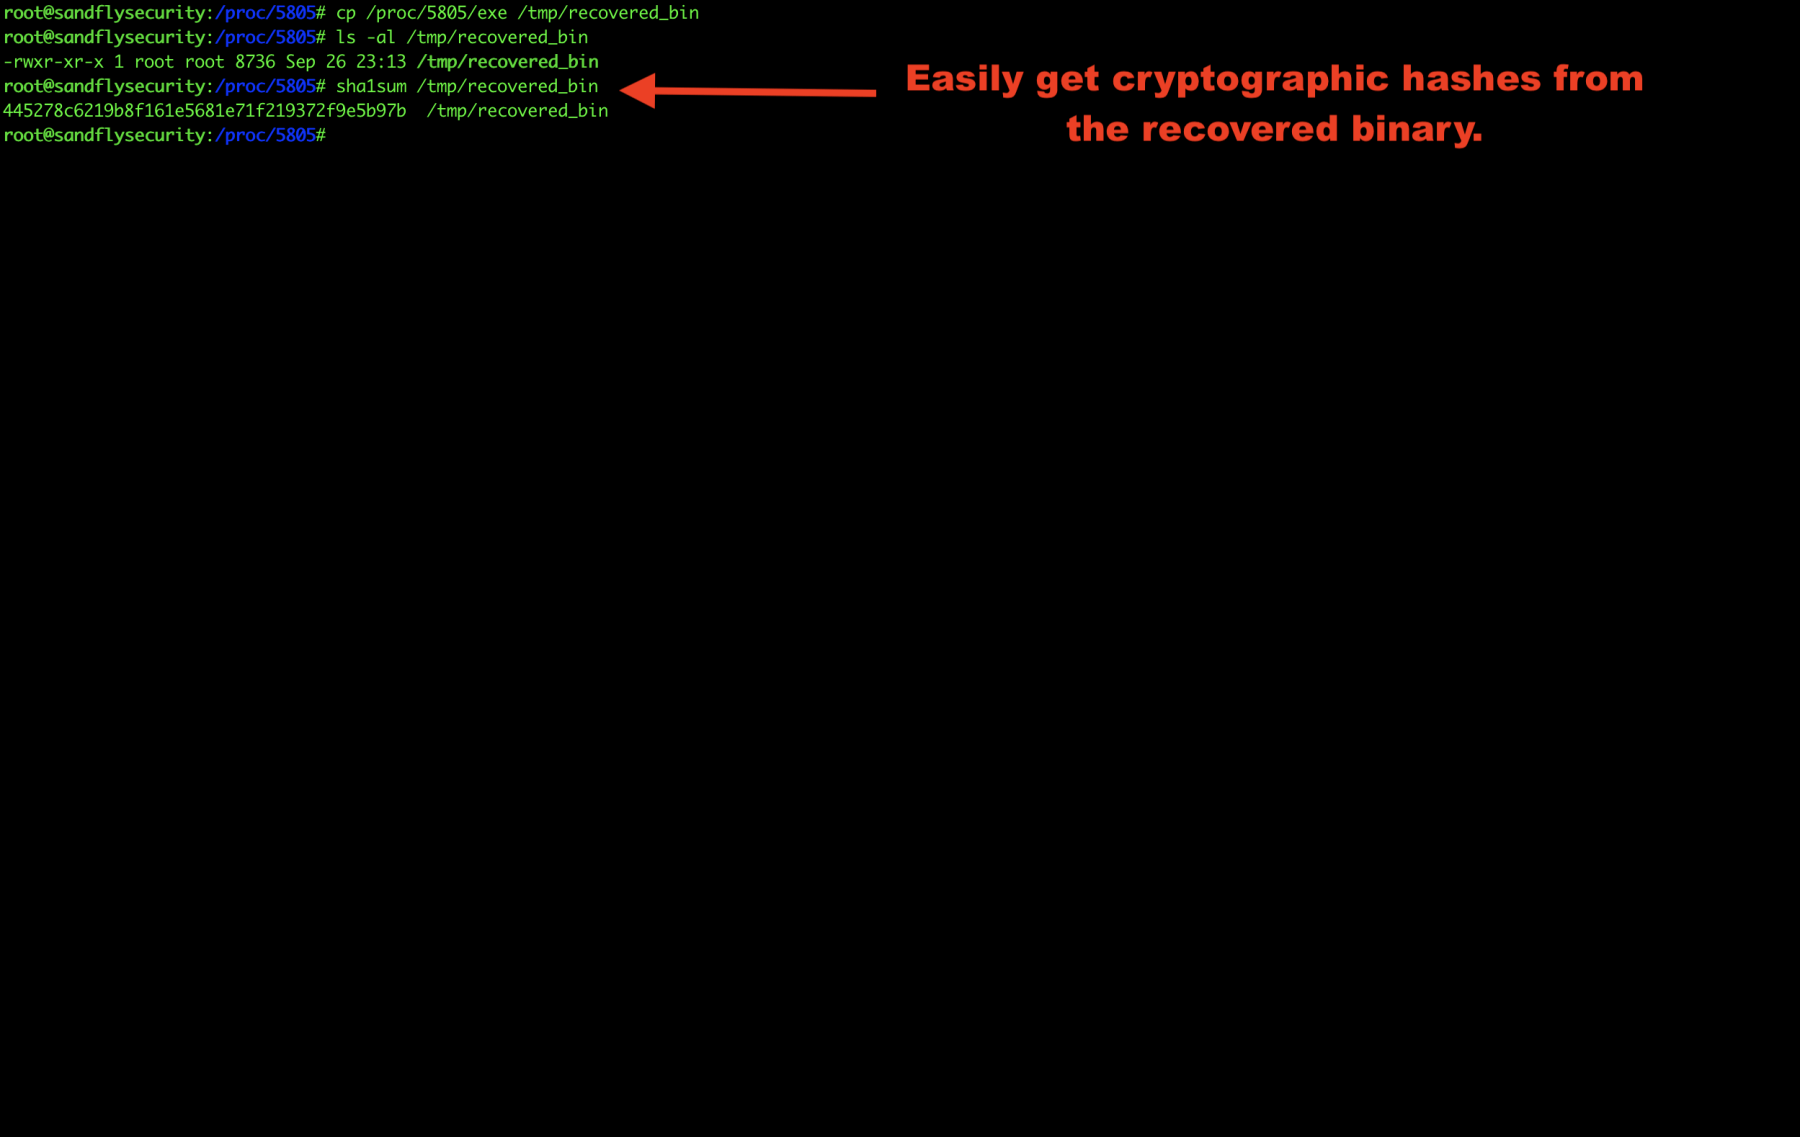
Figure 4 — Getting Linux malware cryptographic hash.
Explore Linux malware command line
The command line is stored under /proc/<PID>/cmdline and the command name is shown under /proc/<PID>/comm.
Some malware will cloak this data to masquerade as another process. You may see different names for the program in this case or even names that are trying to hide as something else like apache or sshd.
If you see multiple different names, then it is very likely the program is malicious.
cat /proc/<PID>/comm


cat /proc/<PID>/cmdline

Figure 5 — Getting Linux malware command line.
Explore Linux malware process environment
Now let’s take a look at the environment our malware inherited when it started. This can often reveal information about who or what started the process. Here we see the process was started with sudo by another user:
strings /proc/<PID>/environ
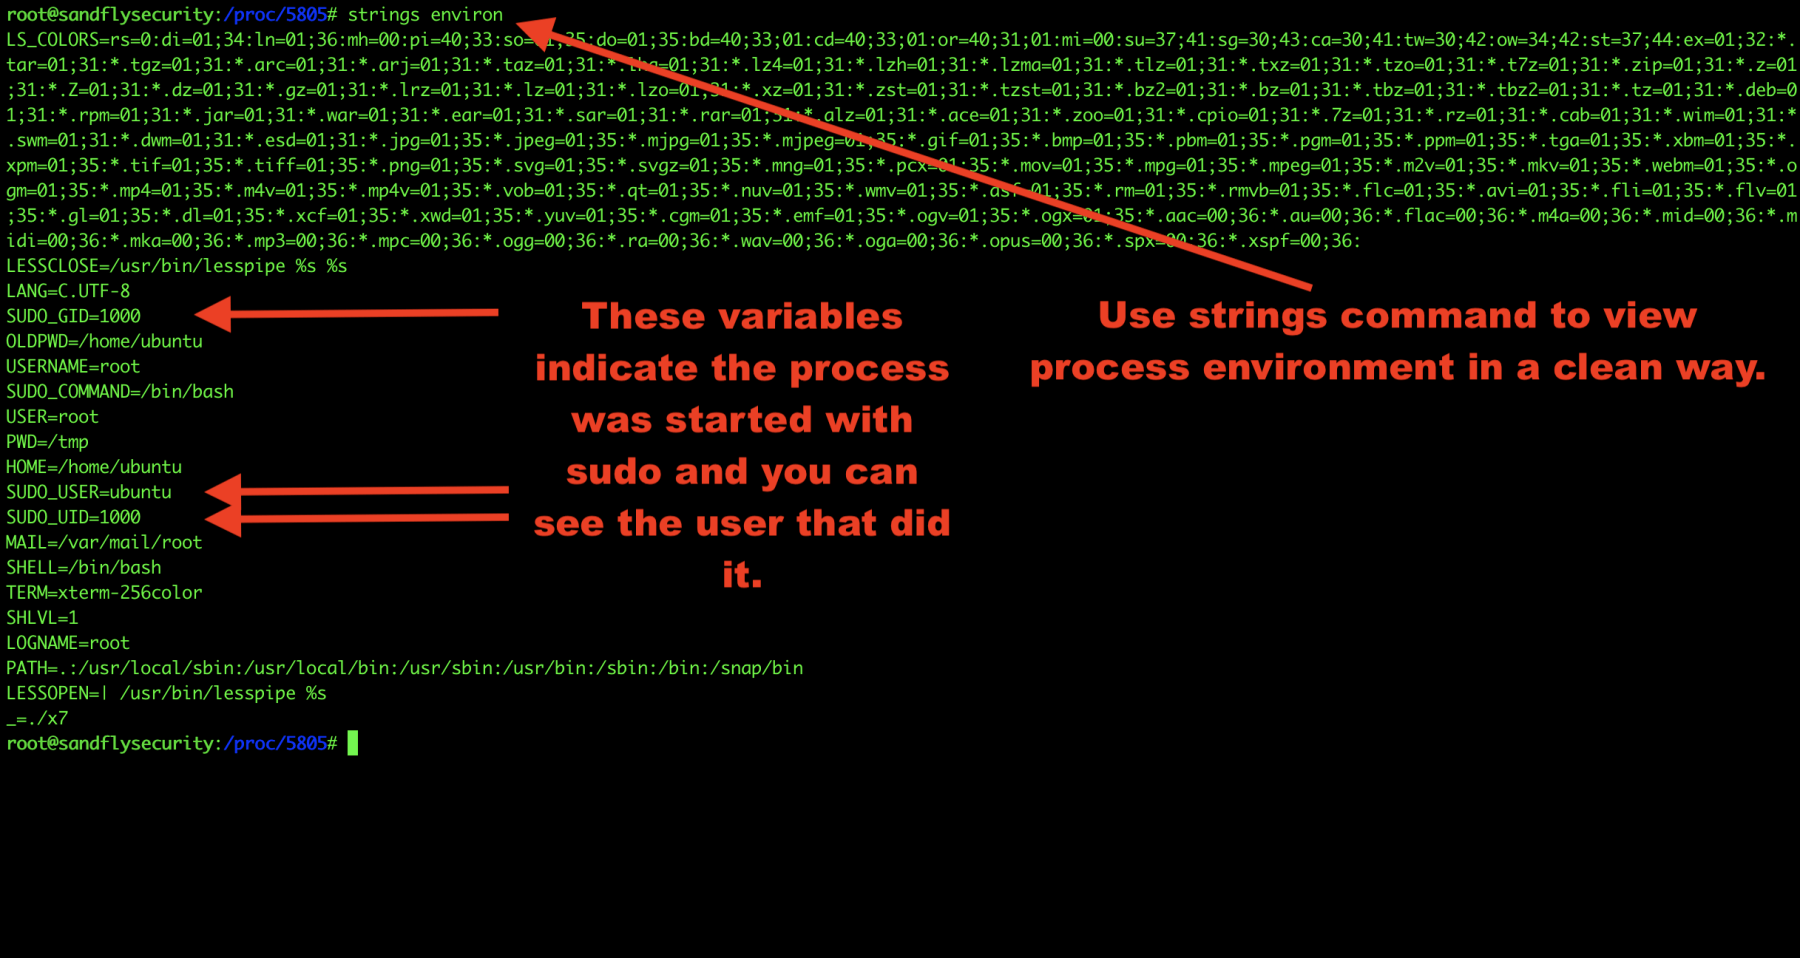
Figure 6 — Obtaining Linux malware process environment.
Investigate Linux malware open file descriptors
We’ll now investigate the file descriptors the malware has open. This can often show you hidden files and directories that the malware is using to stash things along with open sockets:
ls -al /proc/<PID>/fd
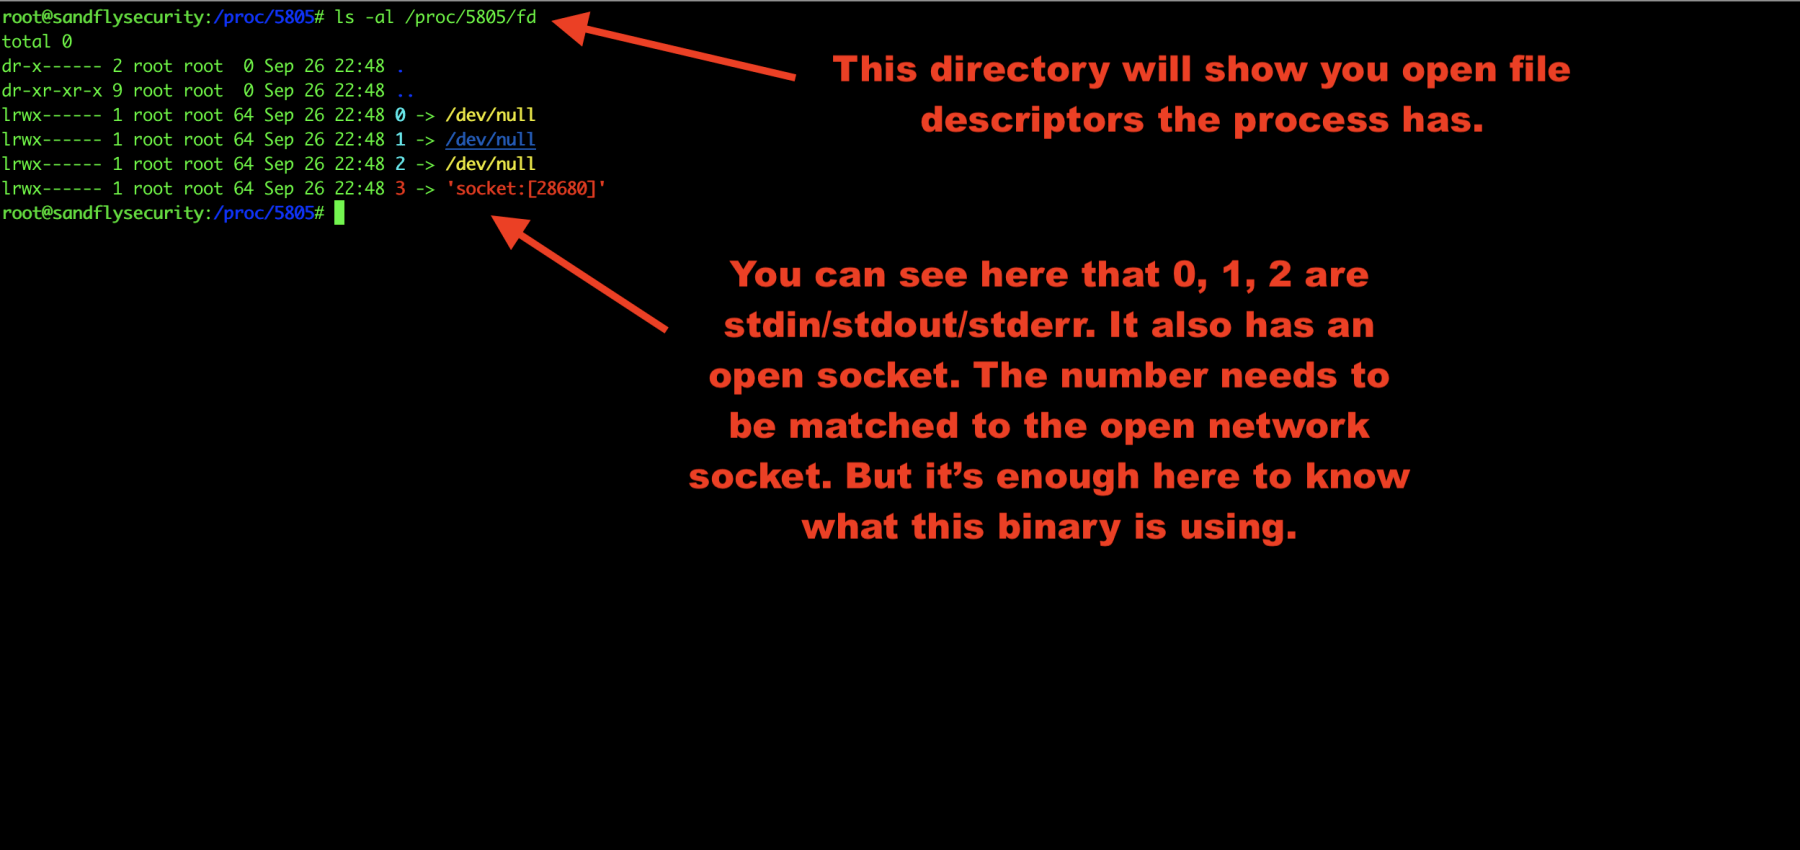
Figure 7 — Linux malware open file descriptors.
Investigate Linux malware process maps
Another area to look into is the Linux process maps. This shows libraries the malware is using and again can show links to malicious files it is using as well.
cat /proc/<PID>/maps
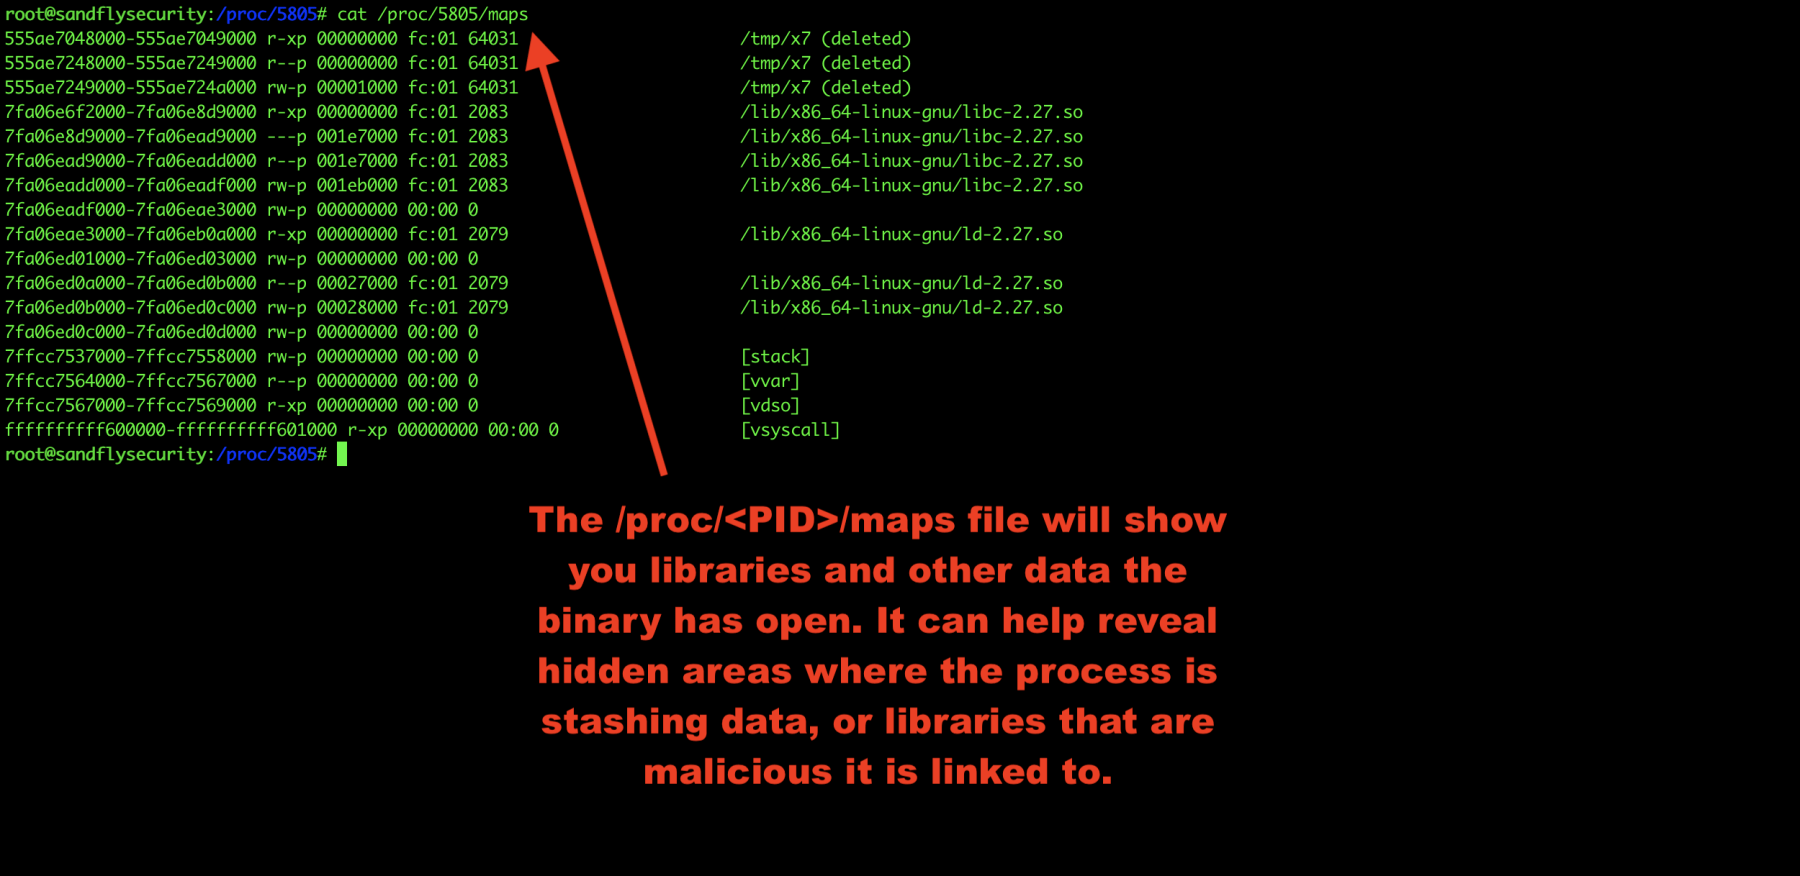
Figure 8 — Linux malware process maps.
Investigate Linux malware process stack
The /proc/<PID>/stack area can sometimes reveal more details. We’ll look at that like this:
cat /proc/<PID>/stack
In this case, we see some network accept() calls indicating this is a network server waiting for a connection. Sometimes there won’t be anything obvious here, but sometimes there is. It just depends on what the process is doing so it’s best to look.
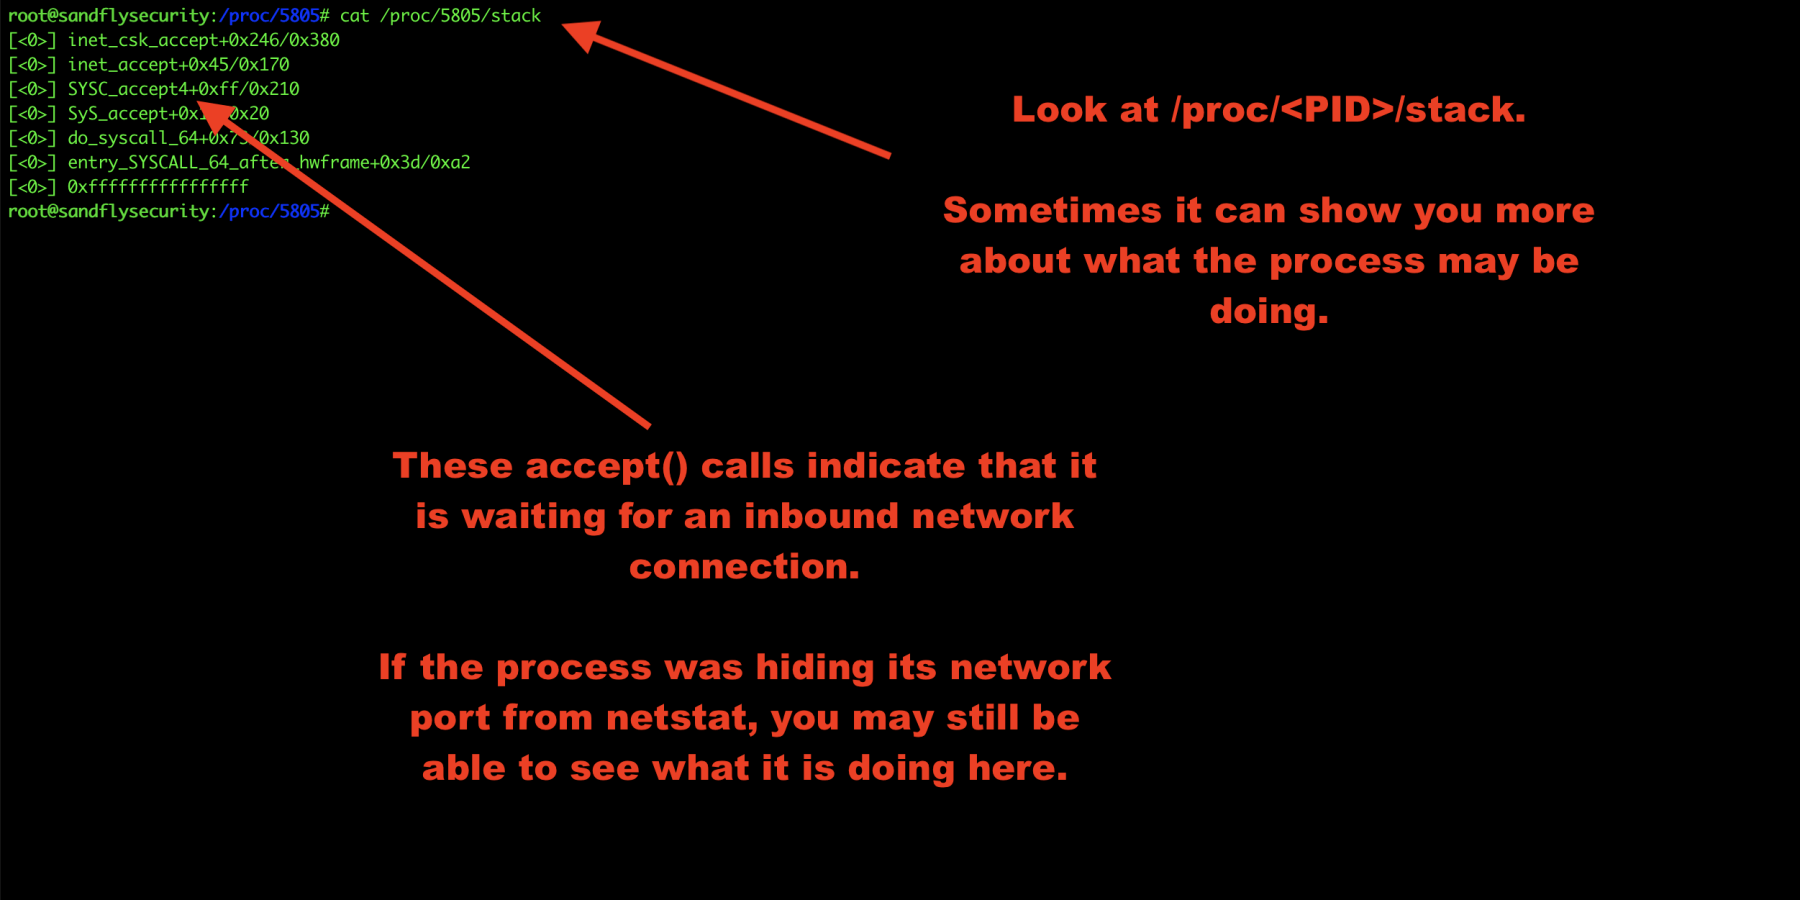
Figure 9 — Linux malware forensics process stack.
Get Linux malware status
Finally, let’s look at /proc/<PID>/status for overall process details. This can reveal parent PIDs and so forth.
cat /proc/<PID>/status
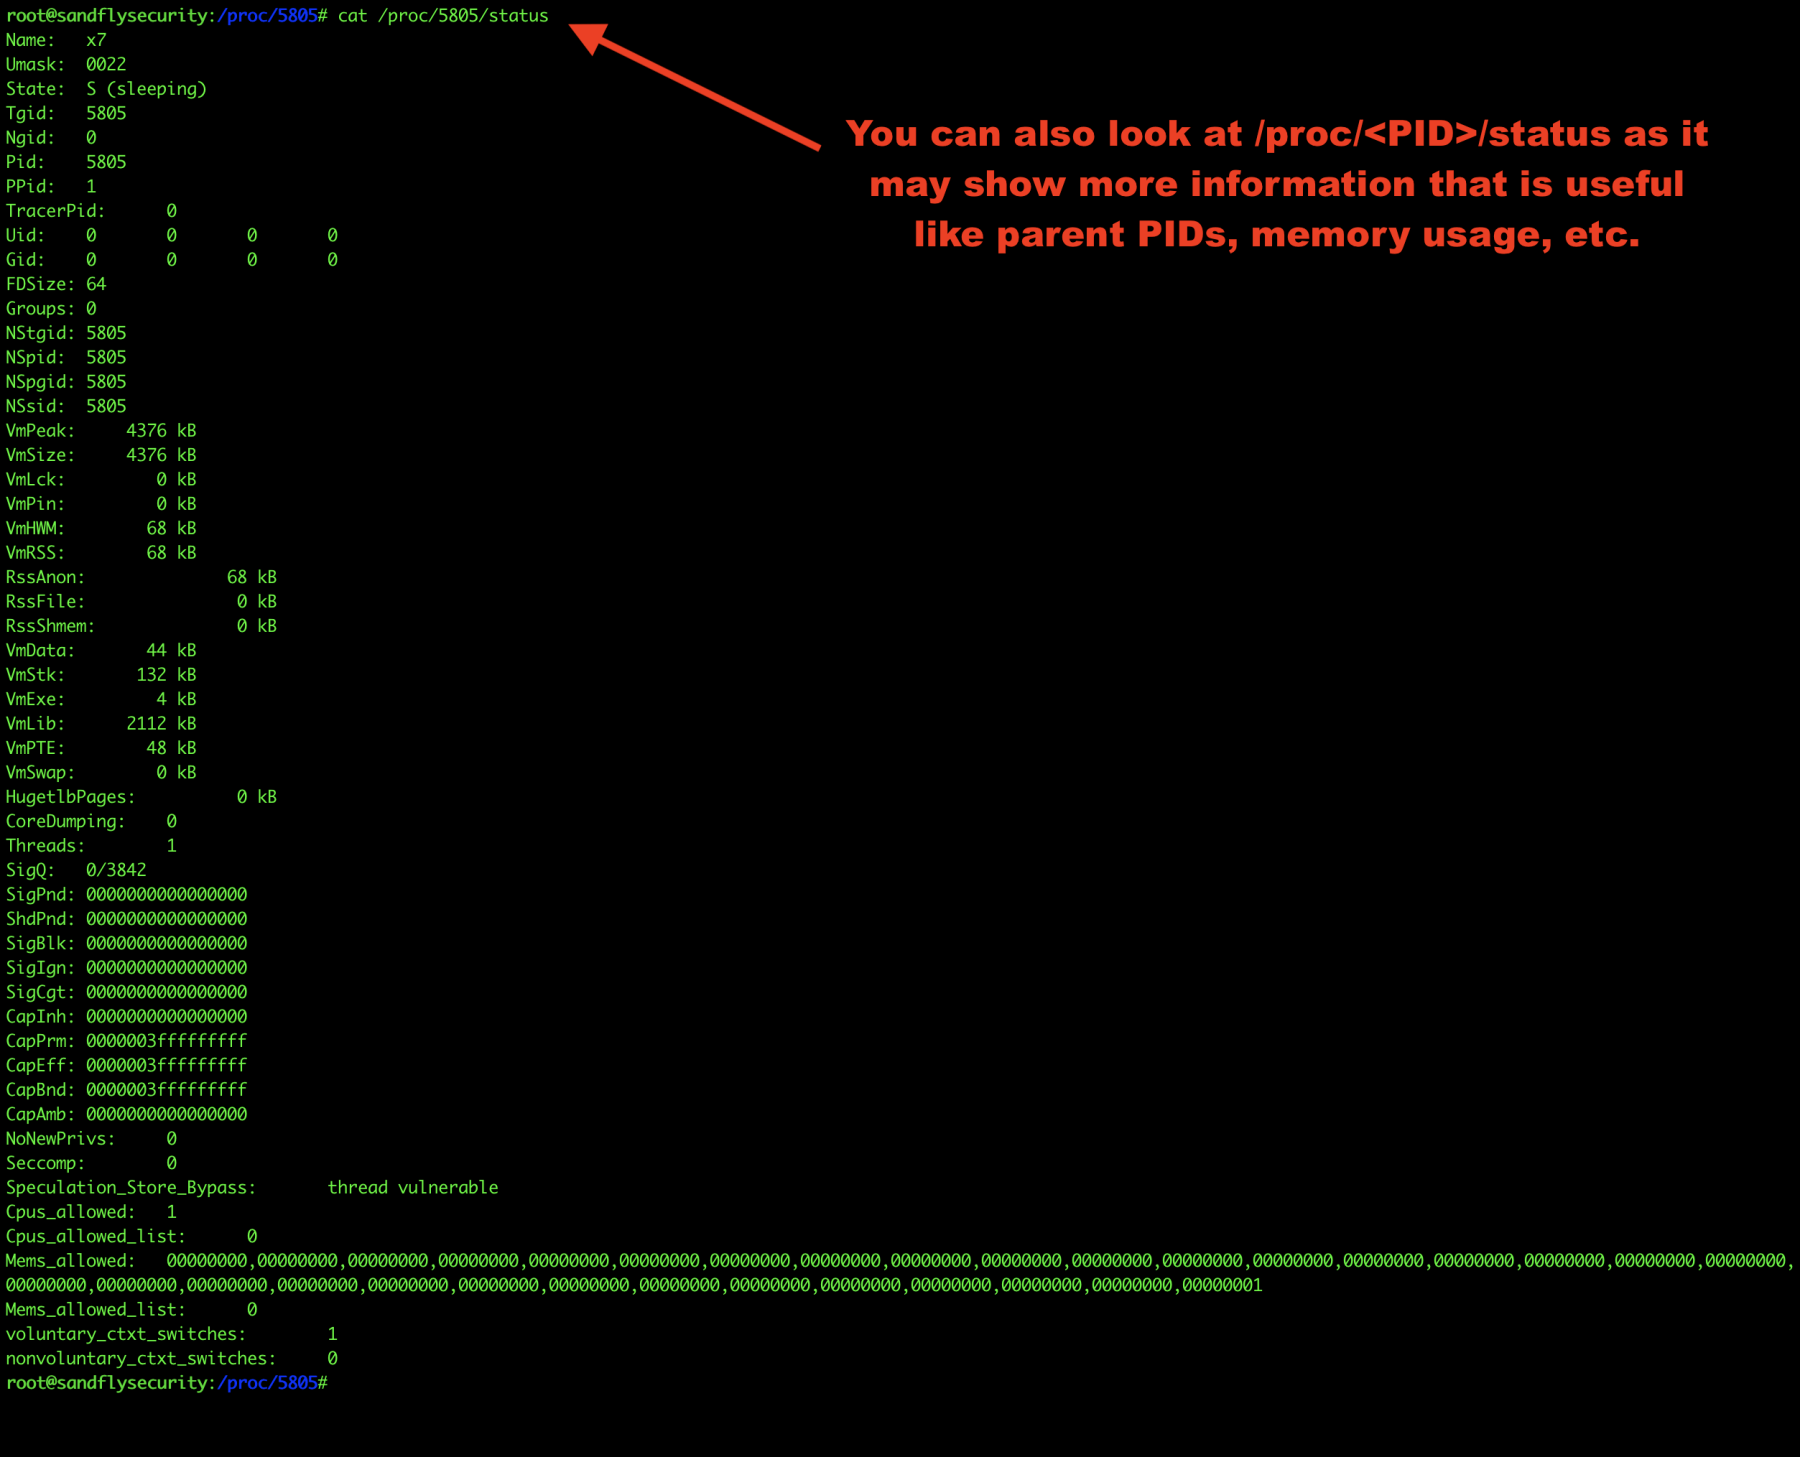
Figure 10 — Linux malware /proc status.
Get the Linux command line forensics cheatsheet
Those are some basics of Linux live process analysis. The big thing is this:
Don’t kill a suspicious process until you have investigated what it is doing.
If you kill a suspicious process out of panic, then you can lose and destroy a lot of useful information. We have created a Linux command line cheat sheet to help you look for these and other artifacts here:
Linux command line forensics cheat sheet
Adapted from original post which appeared on Sandfly Security.
Craig Rowland is Founder and CEO of Sandfly Security.
The views expressed by the authors of this blog are their own and do not necessarily reflect the views of APNIC. Please note a Code of Conduct applies to this blog.
If you can post the interested topics like that, it would be useful
Can you please post more information like this, it is amazing